How to Clean and Maintain a Vacuum
Whether used around the house or by a professional custodial service, the vacuum is arguably the most reliable tool in the fight to keep spaces clean. In fact, today’s vacuum cleaners are so effective at sucking up dirt, dust, crumbs, hair, and countless other things, many people falsely think they can run forever without the need for any maintenance.
The truth is, whether you have an upright vacuum or a shop vacuum that can suck up liquids and solid debris, cleaning and maintaining your vacuum every few months will help it perform better and also remove the harmful germs and bacteria that can live inside it. Here, we’ll cover the main parts of the standard vacuum and what you need to do with each to keep this valuable appliance running its best.
Before getting started, remember to always clean your vacuum in a well-ventilated space to avoid inhaling dust and other particles. And check to make sure your machine is unplugged. Finally, consult your owner’s manual. The specific location of certain vacuum parts can vary based on the manufacturer and model.
Tools for the Job
Here are the main tools you’ll need to clean your vacuum:
- Soapy water (dish soap works great)
- Scissors
- A garbage bag
- Rubber gloves
- A small brush or cleaning toothbrush
- A clean rag or microfiber cloth
- Baking soda
Step 1: The Filter
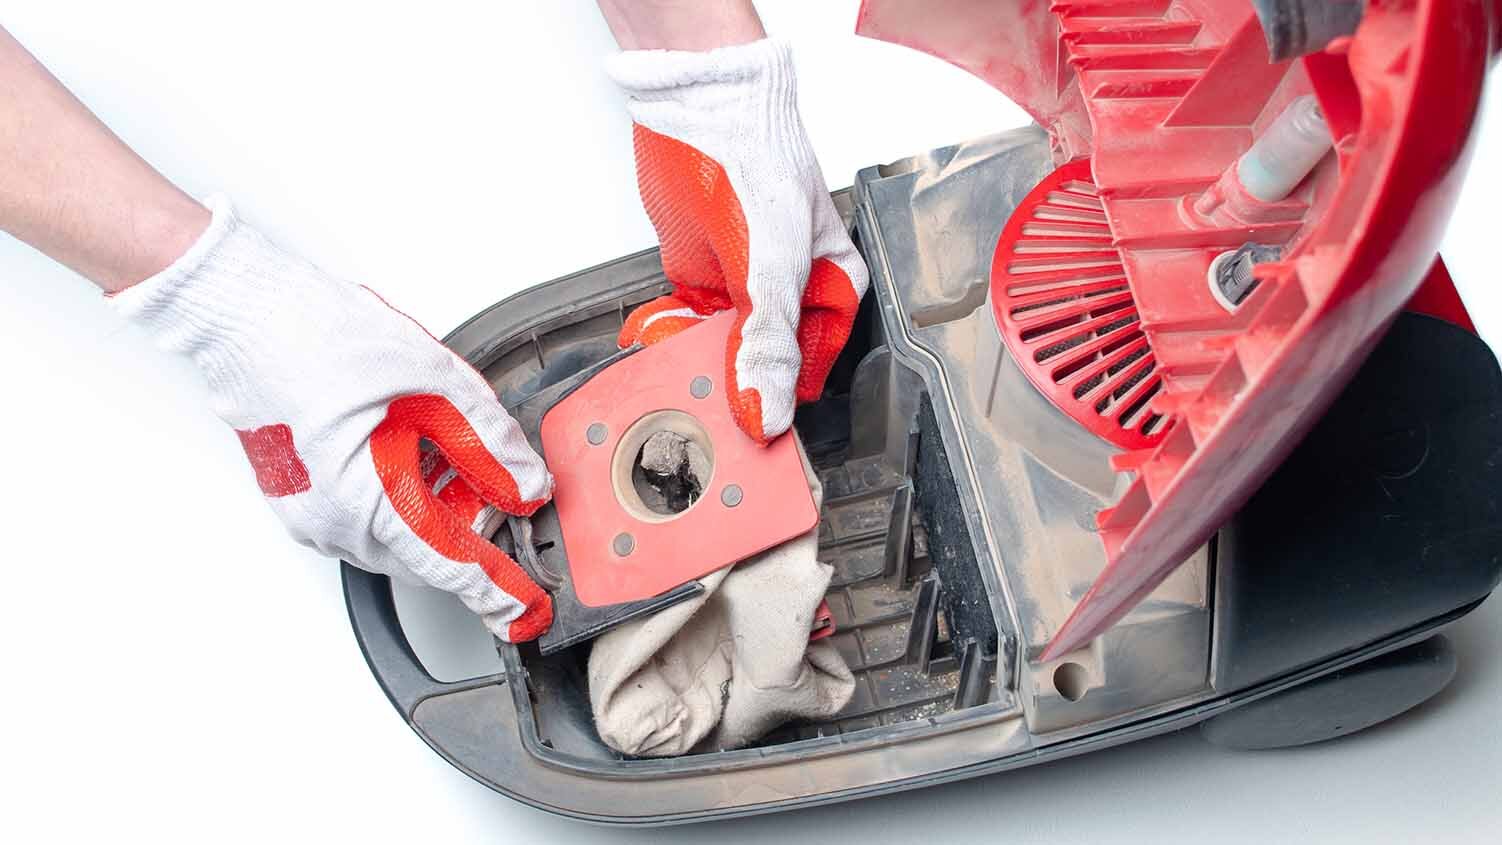
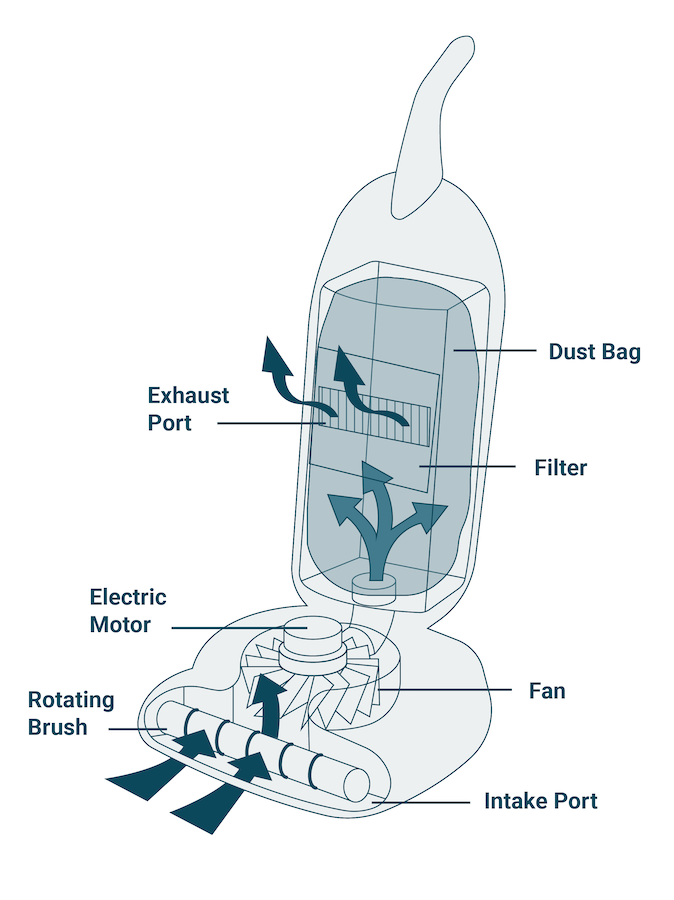
When your vacuum sucks in air, it’s the filter that keeps the dirt and dust from blowing back out of the machine as the air recirculates. Some vacuums have disposable filters, so you can simply throw them out once they get covered in gunk, and install a replacement filter. Those with HEPA (high-efficiency particulate air) filters cannot be cleaned. But many vacuums feature washable filters, which should be cleaned regularly.
To wash, remove the filter from the vacuum (you can consult your owner’s manual if it doesn’t come off easily), shake it until it is empty, and run it under cold water. Then, lay the filter out to dry for 24 hours before returning it to its place. You can also run your filters through the dishwasher (without the dishes, of course).
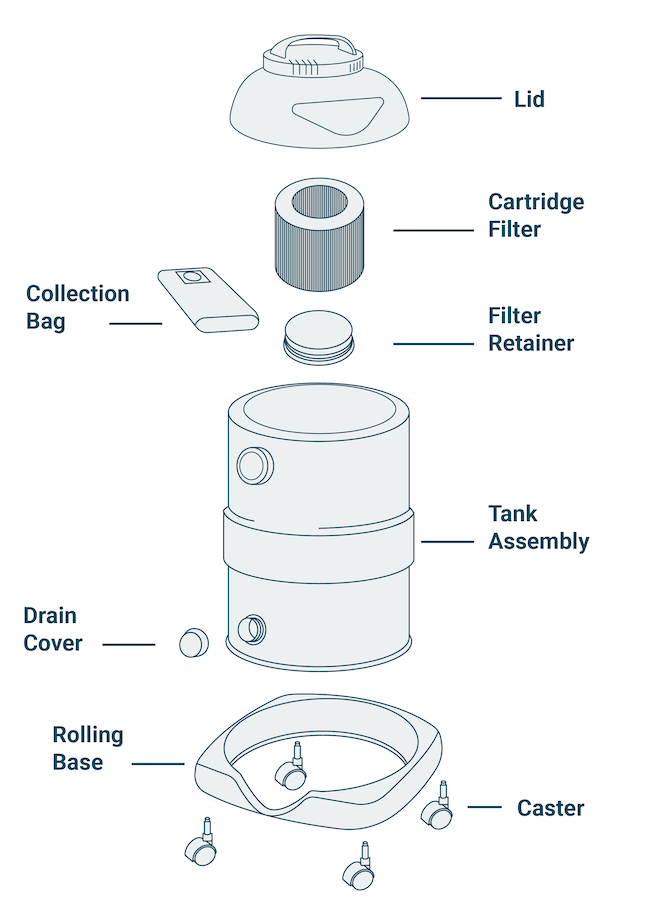
Step 2: The Canister
Some older vacuums still feature a bag, which needs to be replaced when it is full. For those models with a canister, simply remove it from your vacuum and soak it in a bucket of warm, soapy water. For caked-on dirt, scrub with a small brush or old toothbrush. Then rinse. Let it air dry for at least 24 hours before reattaching, as moisture build-up inside your vacuum can lead to mold and mildew and can even damage internal parts or electrical issues.
While the canister is removed from the rest of the vacuum, take a small brush and rub off any dirt or grime from the interior. Brush downward to avoid pushing dirt back into the vacuum, and then wipe it down with a dry rag or cloth. A can of compressed air can be used to blow away any stubborn particles.
Step 3: The Beater Bar or Powerhead
The beater bar is the rotating bar on the floor nozzle, which spins when the vacuum is on and comes in contact with the ground to dislodge dust in carpet fibers. Predictably, this part of the vacuum is a magnet for hair, stray threads, and other surface gunk. Much like how hair can clog a drain in a sink or shower, it can block air from being sucked into your vacuum, so inspect the beater bar often. (If you’re getting poor suction, cleaning the beater bar may have your old vacuum working like new.) Take a pair of scissors to cut away anything wrapped around the bar, being extra careful not to trim off the bristles. Pull away any hair and use a brush to remove any residual dirt.
Step 4: The Hose
Gunk and grime can easily muck up the works as they travel inside your vacuum’s hose, so it’s essential that you clear out the inside to remove any build-up that could block air flow. It’s a good idea to clean inside the hose at least every few months. Check the owner’s manual if it’s not clear how to remove it from the vacuum. Bring the hose to the sink or the bathtub and run hot water through it for a few minutes. Then pour about ½ cup of baking soda into one end and give it a shake to distribute throughout the inside of the hose. Slowly drizzle about two cups of white vinegar inside the hose and listen. When it stops making a fizzing noise, rinse with hot water and let it dry out.
Step 5: The Attachments
Most vacuums come with assorted nozzles, hoses, and specialty tools to help clean hard-to-reach areas. Don’t forget to clean these attachments, as well. Simply soak them in a bucket of soapy water, use your brush to scrub any grime or residue, and let them air-dry for 24 hours before use.
Clean your vacuum often, at least every 2-3 months, and you just might find that it performs better and your cleaning jobs go a whole lot quicker.
Product Compliance and Suitability
The product statements contained in this guide are intended for general informational purposes only. Such product statements do not constitute a product recommendation or representation as to the appropriateness, accuracy, completeness, correctness or currentness of the information provided. Information provided in this guide does not replace the use by you of any manufacturer instructions, technical product manual, or other professional resource or adviser available to you. Always read, understand and follow all manufacturer instructions.