How to Fix Leaking Hydraulic Connections
When you depend on hydraulic equipment, leaks can quickly slow down your operation and drive up costs. Whether you’re running a small repair shop or managing a manufacturing floor, knowing how to fix leaking hydraulic fittings and perform hydraulic seal replacement keeps your systems efficient and safe. This guide walks through practical steps, preventive hydraulic system maintenance tips, and answers to common questions, all in straightforward language you can use on the job.
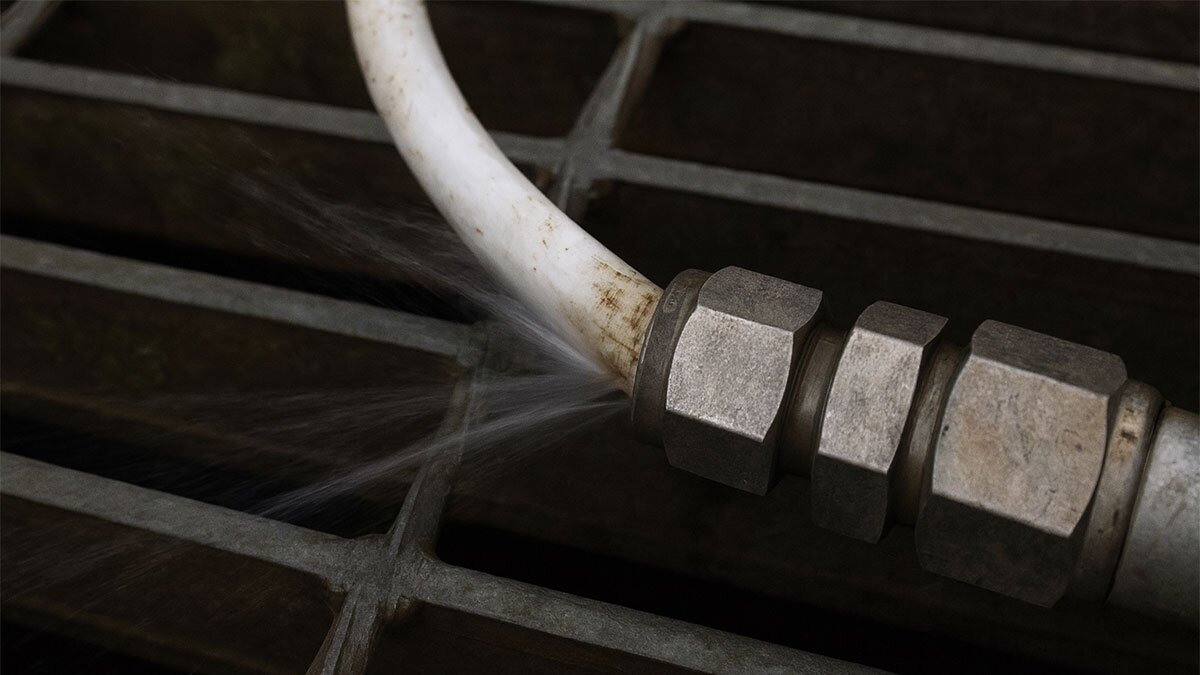
Why Hydraulic Connections Leak
Hydraulic leaks usually come down to a few familiar issues. Understanding the cause helps you fix the problem for good.
Worn or damaged seals and O-rings. Over time, seals lose elasticity or get nicked, allowing fluid to escape.
Improper tightening. Both overtightening and undertightening can distort fittings or prevent proper sealing.
Thread damage or misalignment. Cross-threading or corrosion weakens the connection.
Contamination. Dirt, metal shavings, or residue between sealing surfaces create leak paths.
Vibration or pressure cycling. Repeated movement loosens fittings and compromises the seal.
Metal-to-metal joints. Flare and cone fittings rely on perfect surface contact; wear or scoring can easily cause leaks.
Knowing which of these issues you’re facing determines whether you need to tighten the fitting, replace O-rings and seals, or replace damaged fittings altogether.
Step-by-Step: How to Fix a Hydraulic Hose Leak
Follow these steps to safely and effectively fix a hydraulic hose leak or leaking connection.
1. Depressurize the System
Always start by relieving hydraulic pressure completely. Even a small amount of trapped pressure can eject fluid at dangerous force.
2. Identify the Leak Source
Clean the area thoroughly and run the system at low pressure. Look for fluid weeping around fittings, threads, or seals to pinpoint the problem.
3. Disassemble Carefully
Use the proper tools to loosen the connection. Avoid rounding or damaging the fitting surfaces while removing it.
4. Clean the Components
Remove old sealant, tape, or debris. Clean threads and sealing faces with a lint-free cloth to ensure a proper connection.
5. Inspect for Damage
Check every component: the fitting, threads, hose ends, and sealing surfaces. Replace any parts that show cracks, corrosion, or deformation.
6. Replace O-Rings and Seals
Always install new, correctly sized O-rings or seals. Match the material type to your fluid and temperature range for reliable sealing.
7. Use Thread Sealant Only When Appropriate
Apply a compatible thread sealant or PTFE tape only on tapered threads (like NPT). Don’t use sealant on flare, O-ring boss, or face-seal fittings—it can prevent proper sealing.
8. Tighten the Fitting
Thread the fitting by hand, then tighten to the manufacturer’s recommended torque. Overtightening can crush seals; undertightening can cause leaks.
9. Repressurize and Check for Leaks
Slowly bring the system back up to operating pressure while monitoring for fluid seepage. If no leaks appear, the repair is complete.
10. Recheck After Operation
Inspect the repair again after a few hours of use. A small retightening may be needed once fittings settle under pressure.
Preventive Hydraulic System Maintenance Tips
Fixing a leak is one thing, but preventing future leaks is what keeps your equipment reliable and your downtime low.
Check for leaks regularly. Routine inspections catch small leaks before they grow.
Keep components clean. Dirt and grit accelerate wear on seals and threads.
Follow torque specs. Proper tightening ensures consistent sealing.
Use anti-vibration supports. Secure hoses and lines to prevent loosening from movement.
Stock common replacement parts. Keep extra O-rings, seals, and fittings ready for quick fixes.
Train your team. Make sure everyone knows how to safely depressurize, clean, and assemble fittings.
Inspect after repairs. A quick recheck after initial operation helps verify a lasting seal.
By following these steps, you can extend the life of your hydraulic components and maintain system efficiency over time.
Common Questions About Hydraulic Leaks
Do I always need thread sealant?
Not always. Use it only on tapered threads. O-ring, face-seal, or flare fittings seal mechanically and don’t require additional sealant.
Is overtightening worse than undertightening?
Yes. Overtightening can deform fittings and crush seals, often causing leaks that are harder to fix. Always follow torque specifications.
Can I temporarily patch a leak?
You can try tightening slightly or adding sealant as a short-term fix, but the long-term solution is always to replace damaged fittings or seals.
How often should I inspect my hydraulic system?
At least monthly, or more frequently in high-pressure or dusty environments. Preventive checks are faster than emergency repairs.
Keep Your Hydraulic Systems Running Smoothly
Hydraulic leaks are common, but they don’t have to become routine. When you clean the area, identify the leak source, replace worn seals, and tighten fittings correctly, you’ll reduce downtime and maintain dependable performance.
A little hydraulic system maintenance goes a long way toward keeping your business productive and your equipment ready for the next job.
Product Compliance and Suitability
The statements contained in this guide are intended for general informational purposes only. Such statements do not constitute a product recommendation or representation as to the appropriateness, accuracy, completeness, correctness, or currentness of the information provided. Information provided in this guide does not replace the use by you of any manufacturer instructions, technical product manual, or other professional resource or adviser available to you. Always read, understand, and follow all manufacturer instructions. Portions of this article were generated in part by ChatGPT, and edited by a member of the Zoro team.