How to Install and Maintain Bathroom Faucets
Installing a bathroom faucet is a project that can intimidate even the most seasoned of DIYers. But with proper planning and the right tools, anyone can update their sink or replace a leaky faucet—no professionals required.
Before beginning, it is vital that you identify the type of faucet you are dealing with, as each one has unique configurations and may require specific tools.
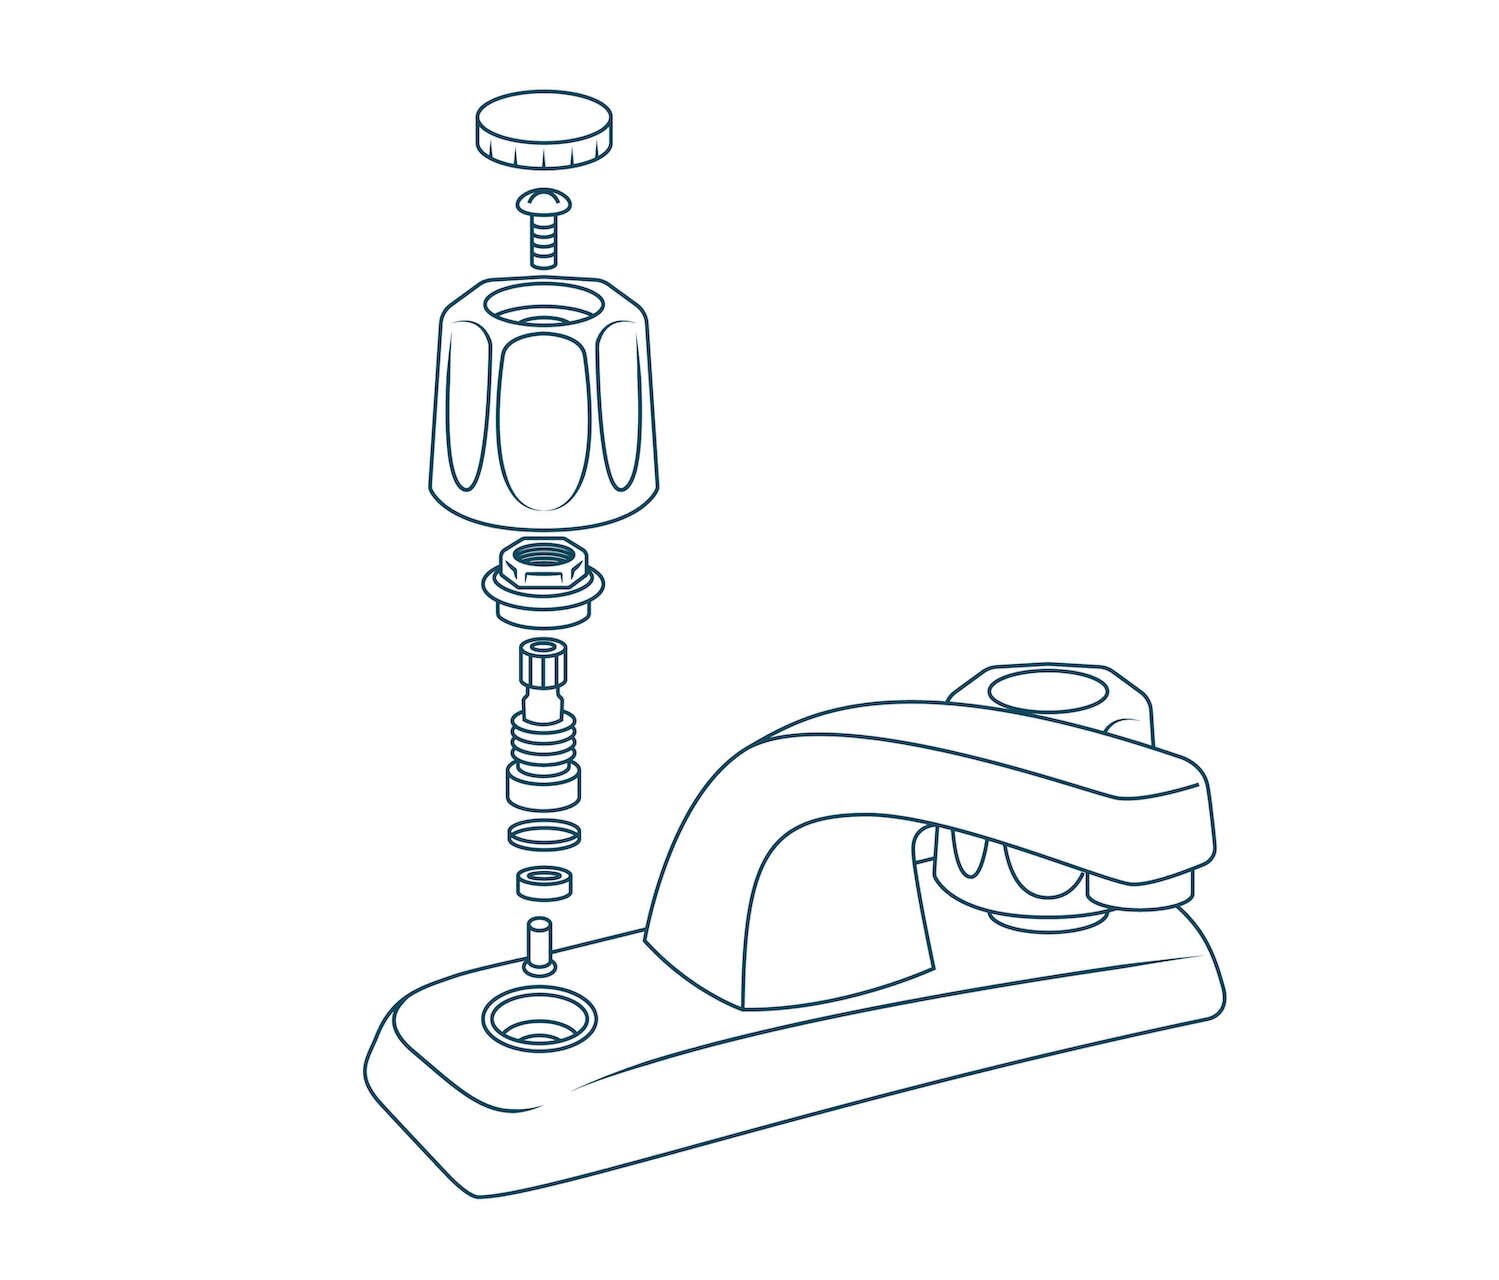
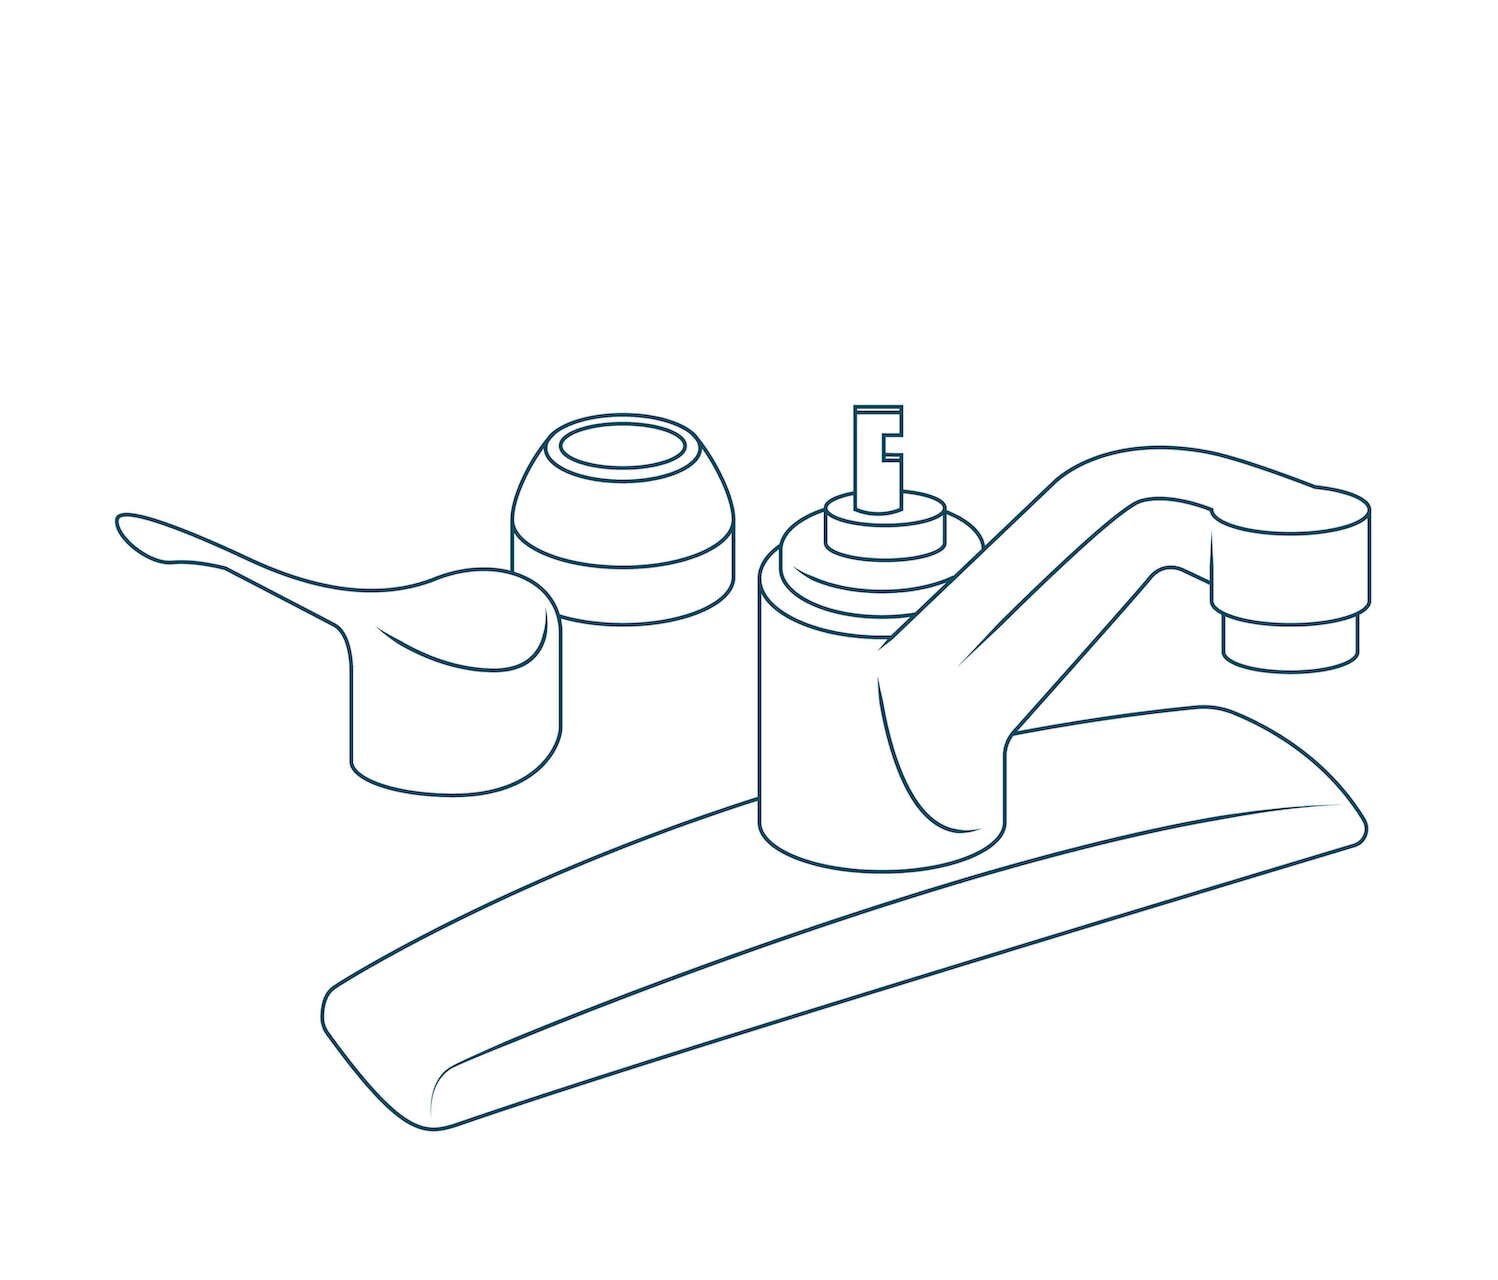
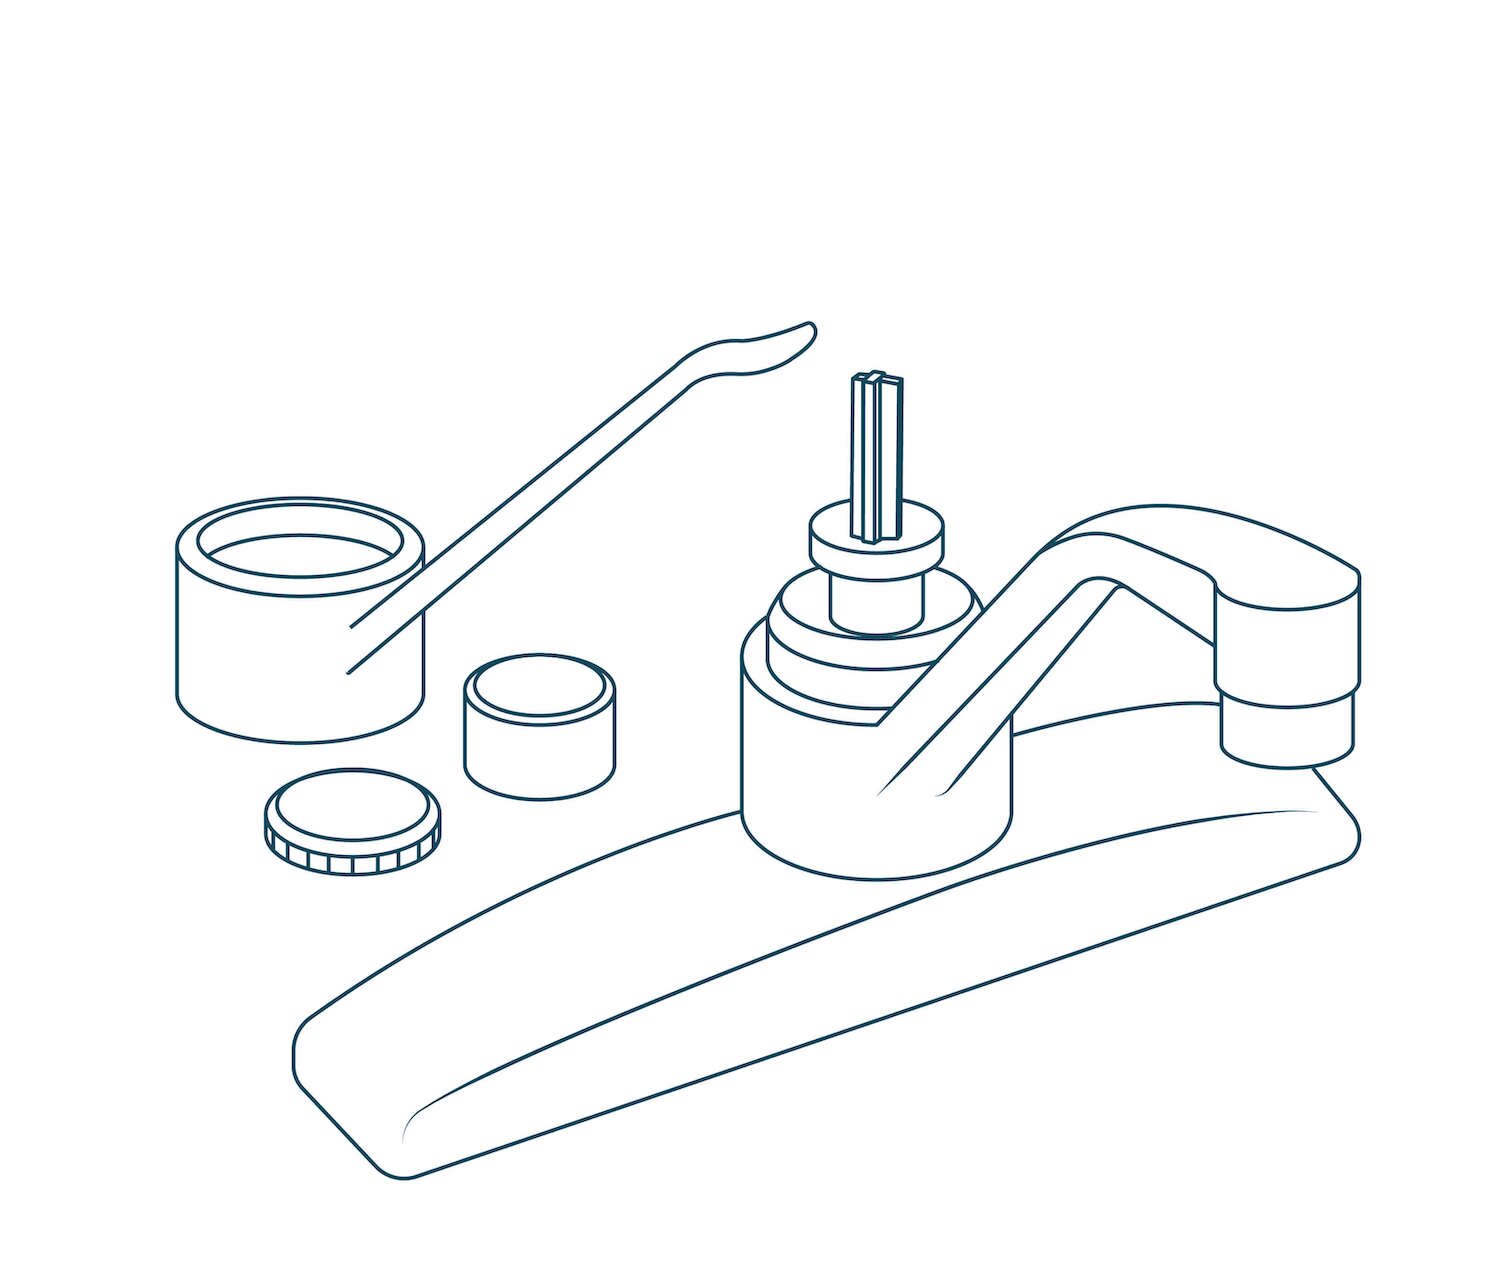
Note: There are four major categories of bathroom faucets. They include those with two screw handles, known as compression faucets, and three types that feature a single, central swivel arm: ceramic disc faucets, cartridge faucets, and ball faucets.
|
Compression Faucet |
Ceramic Disc Faucet |
|
Cartridge Faucet |
Ball Faucet |

Faucet Parts
On compression faucets, the main parts are the cap/index button, handle, stem cartridge, seat and spring, faucet spout, and aerator.
On faucets with a single arm, parts include the faucet lever, dome, cartridge, spout O-rings, faucet spout, and aerator.
Tools
You’ll need the following plumbing specialty tools for the project:
- Adjustable wrench
- Basin wrench
- Bucket
- Towel
- Flashlight
- Measuring tape
- Plumber’s tape
- Sponge
- Rag
How to Install a Faucet: from Start to Finish
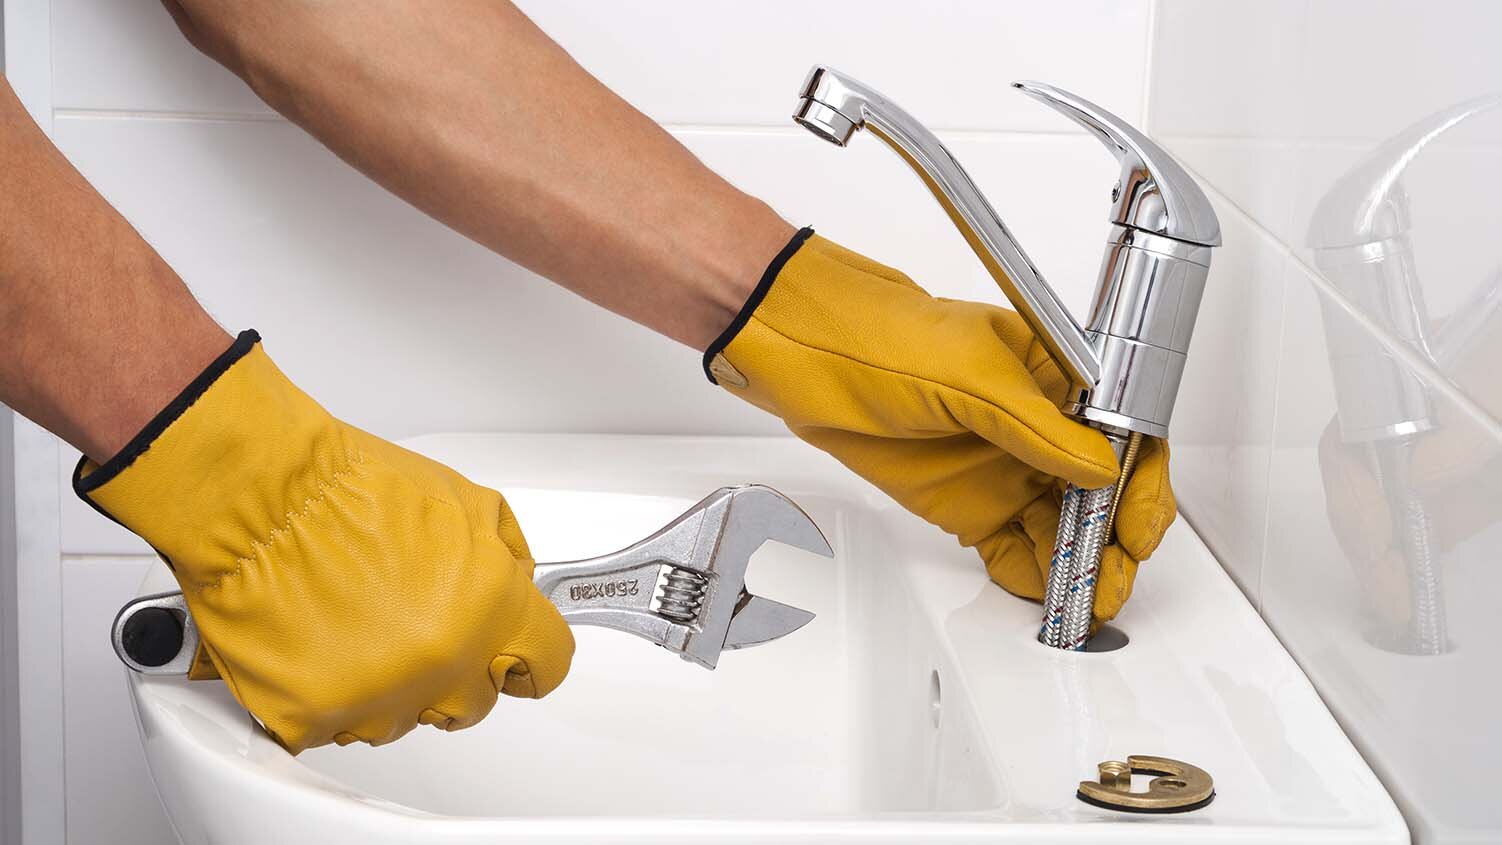
If you’re replacing an existing faucet, you’ll first have to remove the old one.
Step 1
Turn off the water supply using the valves, which are usually found under the sink. If you can’t find them, turn off the water at the main valve in your home’s main utility area. Slowly turn on the faucet to relieve any water pressure in the plumbing lines.
Step 2
Disconnect the supply lines to the faucet. Use a basin wrench if needed.
Step 3
Disconnect the lift rod that attaches the faucet to the sink and remove the nuts underneath the faucet.
Next, remove the matching drain (if needed).
Step 1
Unscrew the slip nut on the P-trap (the 90° fitting on the outer end of the U-shaped pipe under the sink). You’ll want to have a bucket ready to catch the water under the trap and some rags or towels to wipe up any splashes.
Step 2
Disconnect the drain flange from the tail piece. It should be relatively easy to unscrew.
Step 3
Use mineral spirits or bathroom cleaner to clean the areas around the drain and faucet holes.
Now, it’s time to install your new faucet.
Step 1
In most cases, you’ll begin by installing the gasket at the bottom of the faucet, although some types might utilize plumber’s putty or another type of sealant to connect the faucet to the sink fixture. On compression faucets you’ll see three holes, while ceramic disc, cartridge, and ball faucets all feature a single hole.
Step 2
Wrap the threads of the faucet tailpipes with plumber’s tape, which lubricates fittings and helps promote a better seal between components. Because the tailpipes connect the water supply hose to the faucet, plumber’s tape is a good preventative measure to stop leaks. Don’t extend the tape past the end of the pipe.
Step 3
Insert the faucet into the mounting holes. Once it is placed in position, insert a washer over each tailpipe and twist the nuts clockwise to tighten. Finish tightening using your adjustable wrench, but don’t over-tighten as it could damage your fixture.
Step 4
Connect the water supply hoses. Begin by connecting the hoses to the faucet first. Then attach each hose to the tailpipe. Start turning by hand and then finish using your adjustable wrench again.
Step 5
Test the faucet. Turn the shutoff valve counterclockwise to turn the water back on at the supply line valves. Remove the aerator on the spout and let the water run for a few minutes to flush out the new fixture. While the water is running, inspect for drips. If everything looks good, replace the aerator.
Congratulations! You’ve just improved the look of your bathroom with a brand new faucet.
Cleaning and Maintenance
To keep your fancy new faucet and fixture looking new, clean them regularly. Along with everyday grime and gunk that can build up over time, sinks also offer a hot and humid environment that encourages microbe growth. Certain microbes can cause stains and odors, while others can transmit bacteria and be especially dangerous in public areas. Here’s a step-by-step guide to make sure your faucet sparkles—and stays safe.
Step 1
Steer clear of abrasive brushes. Rough wire or nylon brushes can easily ruin the sparkling finish on your new faucet.
Step 2
Start with dish soap and water. For day-to-day cleaning, this is perfectly sufficient. Use warm water and a clean cloth, and then a dry cloth to buff it to a shine.
Step 3
For more stubborn grime and build-up, clean with vinegar. One half cup of hot water mixed with one half cup of everyday white vinegar will work wonders. Before cleaning, test a small area of the faucet to make sure the cleaning solution won’t damage the finish.
Step 4
If all else fails, grab a toothbrush and some baking soda. Just a tiny amount of baking soda and a few drops of water are plenty. Scrub around the faucet and handles as needed and those stains should disappear.
Product Compliance and Suitability
The product statements contained in this guide are intended for general informational purposes only. Such product statements do not constitute a product recommendation or representation as to the appropriateness, accuracy, completeness, correctness or currentness of the information provided. Information provided in this guide does not replace the use by you of any manufacturer instructions, technical product manual, or other professional resource or adviser available to you. Always read, understand and follow all manufacturer instructions.