How to Install Mixing Valves
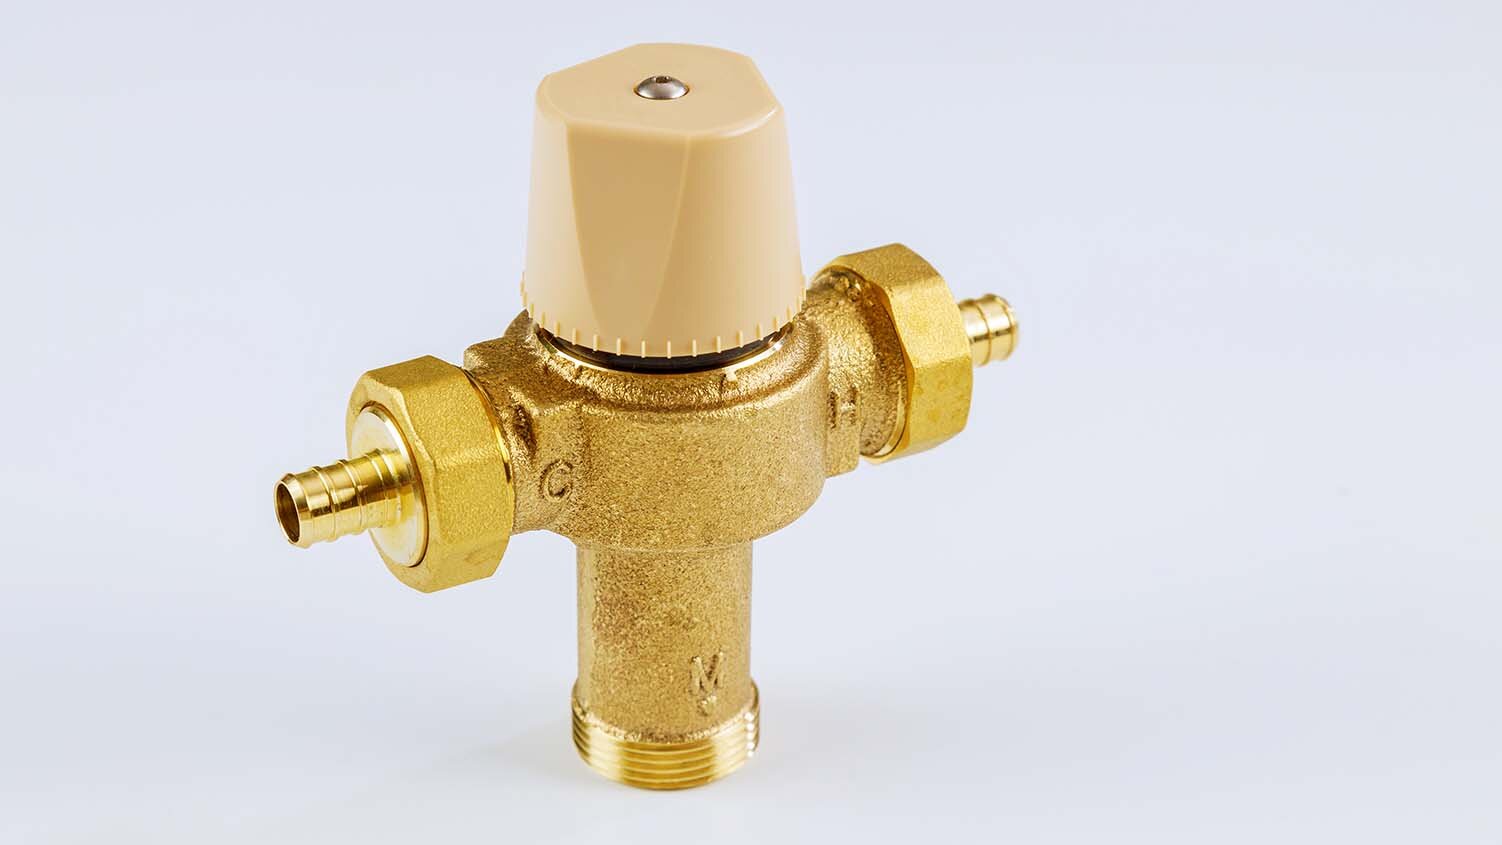
A mixing valve is any plumbing device that balances the mix of hot and cold water that comes out of the tap. Every time you turn on your shower or the faucet on your sink, it’s the mixing valve that prevents you from getting sprayed with extremely hot or cold water. Sometimes referred to as a thermostatic mixing valve, this vital part of your plumbing system should not be confused with a diverting valve, which is the mechanism that switches the flow of water between a tub’s faucet and the shower head.
Mixing valves feature a thermostat that is preset to close a plunger and automatically block the supply of hot water in the event a shower or sink’s cold water pressure stops unexpectedly. While some manual models exist, properly functioning central mixing valves operate seamlessly behind the scenes, helping reduce the chances of getting scalded by combining the hot and cold water in a mixing chamber. This is a real concern because the water in a home must be stored at fairly high temperatures to prevent the growth of bacteria inside storage tanks.
Keep in mind, the mixing valve can also be the culprit if the opposite problem occurs and you suddenly can’t get hot water. An easy way to determine whether you have a mixing valve issue or a water tank issue is by checking the temperature of the water coming from both pipes. If both are cold, then the signs point to the water tank itself. However, if the water tank line is warm but the pipe coming from your mixing valve is cool, that usually means you have to buy yourself a brand new mixing valve.
While many plumbing projects are best saved for professionals, installing a new central mixing valve in your home is a relatively easy project if you follow the steps below. The only tools you’ll need are the following: a hex wrench, an adjustable wrench, a thermometer, a slotted screwdriver, and possibly solder.
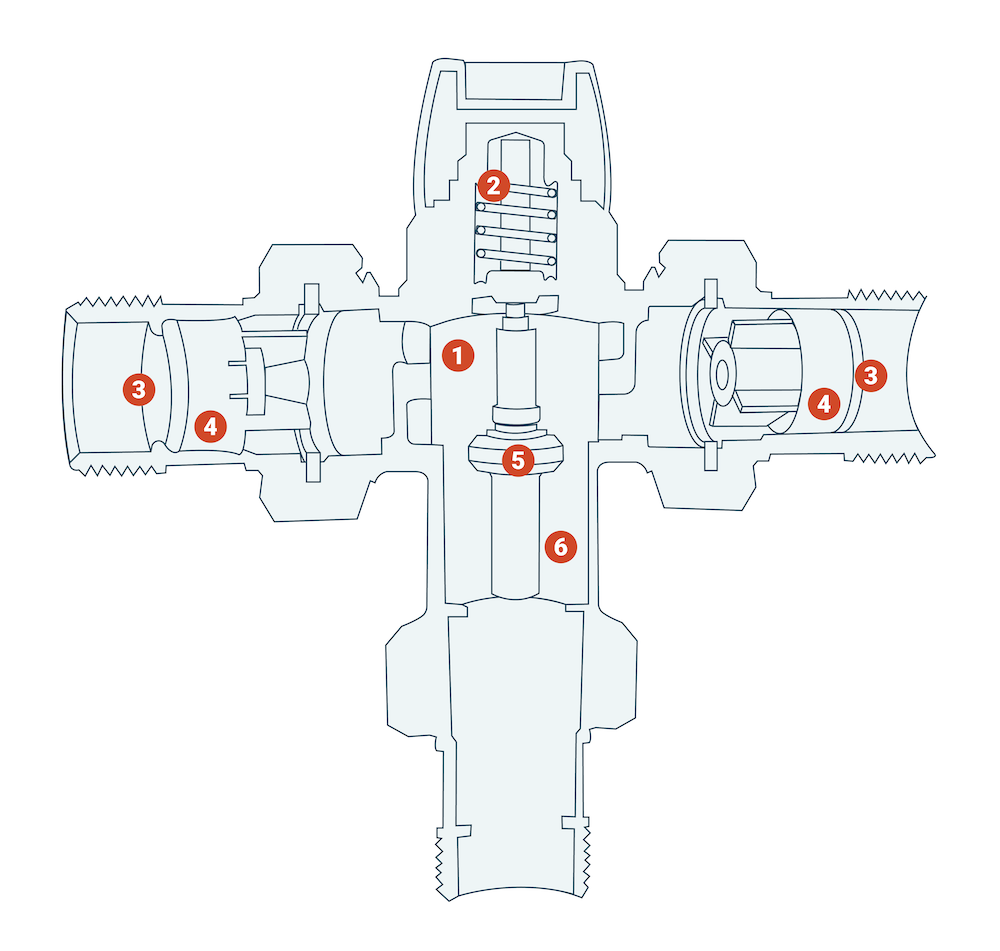 |
1. Regulation obturator 2. Headwork 3. Strainers 4. Check valves 5. Thermostatic sensor 6. Flow conveyor |
Step 1: Turn off the water supply and drain the lines
Your first step is to turn off the flow of water. After shutting off the primary water supply, you must drain the lines of any water by opening the faucets around your home. This will empty the pipes by letting air in. Be aware that it could take an hour or so for all of the pipes to completely drain.
Step 2: Select a location
Because mixing valves sometimes need to be cleaned, maintained, and adjusted over time, choose a spot where the device will remain easily accessible.
Step 3: Connect the water supply pipes
Make sure the diameter of the water input valve matches the diameter of the mixing valve when making the connection. Check the pressure of both the hot and cold supply lines to make sure it doesn’t differ by more than 10 pounds per square inch—anything that exceeds that differential could disrupt the water balance. If necessary, a balancing valve can be added to the pipes to control the blending of water prior to reaching the mixing valve. There is a connection for each hot and cold supply line and then one for the mixed water outlet. The mixing valve can be connected using an adjustable wrench.
Note: If the mixing valve is not already threaded to the pipe where it is being installed, you will need to solder the connections to the valve prior to putting the mixing valve in place. This will prevent any damage or warming of the sealing gaskets. If soldering, wait for the pipe and valve to cool before continuing the assembly.
Step 4: Adjust the water temperature
To determine your hot water temperature, turn the water supply back on and simply turn on a faucet. Let it run for roughly two to three minutes and then check it using a household thermometer. If the temperature is too warm or too cold, unlock the temperature-adjusting screw on the mixing valve using a hex wrench and turn it clockwise to turn the temperature down and counterclockwise to turn the temperature up.
Turn the faucet on again and confirm the setting matches the temperature using your thermometer or use your hand to confirm the water temperature works for you. Regardless, it is recommended that you follow the manufacturer’s instructions when choosing the mixing valve’s minimum and maximum temperature settings.
Step 5: Check for leaks
While running the water, you can also check for any leaks in the pipe or in the valve components. If you notice any leaks, you may need to repair your pipes or adjust the valve accordingly.
Maintenance
Once you have your new mixing valve fully operational and at a safe temperature that works for you, be sure to keep it working properly by cleaning it on a regular basis. This can easily be done by soaking its internal parts in vinegar. Always avoid cleaning with harsh chemicals that could damage the inner valve and spring mechanism.
Product Compliance and Suitability
The product statements contained in this guide are intended for general informational purposes only. Such product statements do not constitute a product recommendation or representation as to the appropriateness, accuracy, completeness, correctness or currentness of the information provided. Information provided in this guide does not replace the use by you of any manufacturer instructions, technical product manual, or other professional resource or adviser available to you. Always read, understand and follow all manufacturer instructions.