How to Bend Conduit
Learn the techniques and tools needed to create precise conduit bends
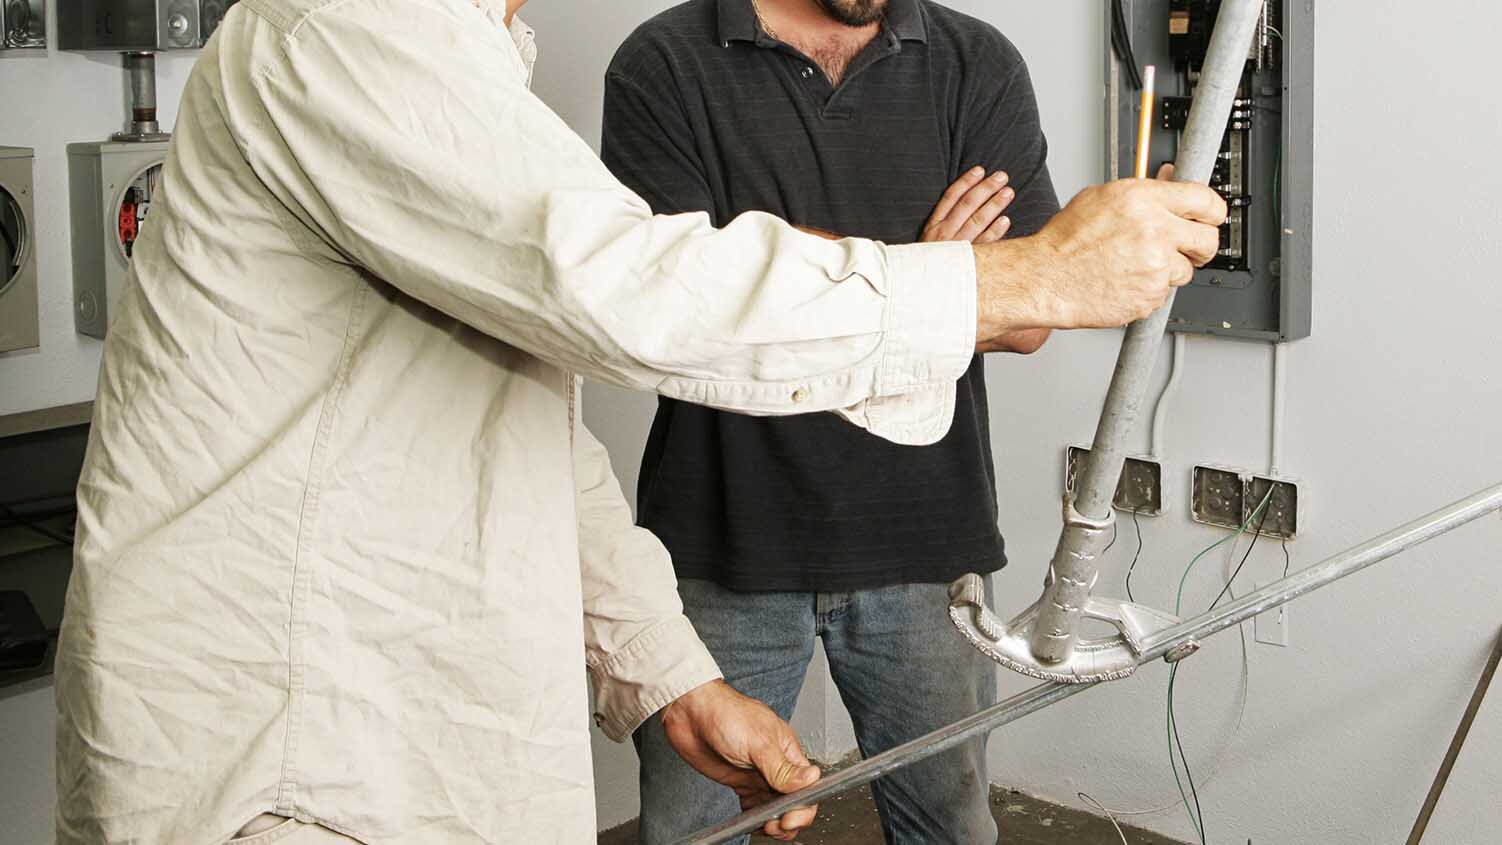
With a little study and some practice on scrap pieces, learning how to bend conduit can be mastered by nearly any electrician. A tape measure, a good quality torpedo level, a marker such as a Sharpie, and a conduit bender are the primary tools you'll need to bend conduit to create a raceway. Along with these tools, it's important to use patience when learning to bend conduit. It's not a particularly easy skill to learn quickly, especially with the variety of bends possible and the materials that can be bent.
Electrical Metallic Tubing (EMT) is one of the more commonly used types of conduit and four of the most common bends include the 90° stub-up, back-to-back, offset, and a three-point saddle. Regardless of the bend, it's important to use the correct conduit bender for the size of conduit to be bent. You can't use a 1⁄2" conduit bender to bend 1" conduit, so it's smart to have available a number of different benders to bend different size conduits.
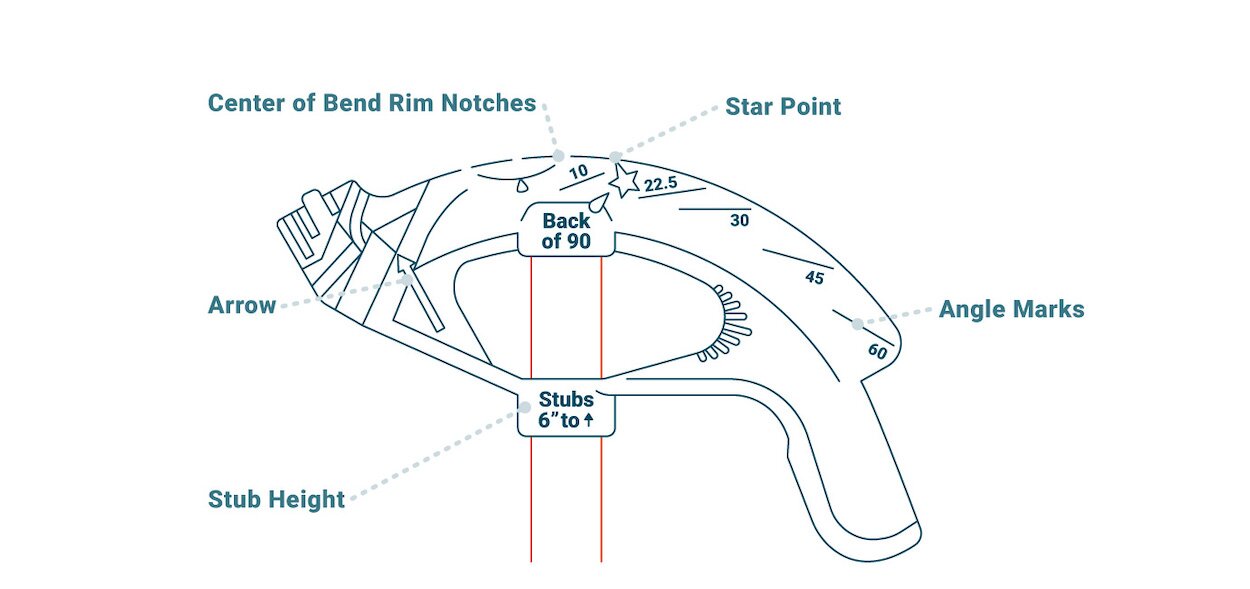
To aid in making a proper bend, conduit benders typically have a variety of standard markings to assist with the process. The 90° mark indicates the point at which the conduit is bent at a right angle. Other common angle marks include the 10°, 22.5°, 30°, 45°, and 60°, as well as the stub height mark that lists a number (such as 6") to use for the bender take-up. There also might be a star point used for back bends, an arrow for use with stub-up bends, offset and outer marking of saddle bends, and center-of-bend rim notches used to locate the center of a saddle bend.
One thing you'll want to do before starting is to prep for bending. This includes measuring the length of conduit needed, calculating any extra required, and then cutting it to size and removing any burrs left from the cut. Once done, you're ready to perform the aforementioned most common bends.
90º Stub-Up Bend
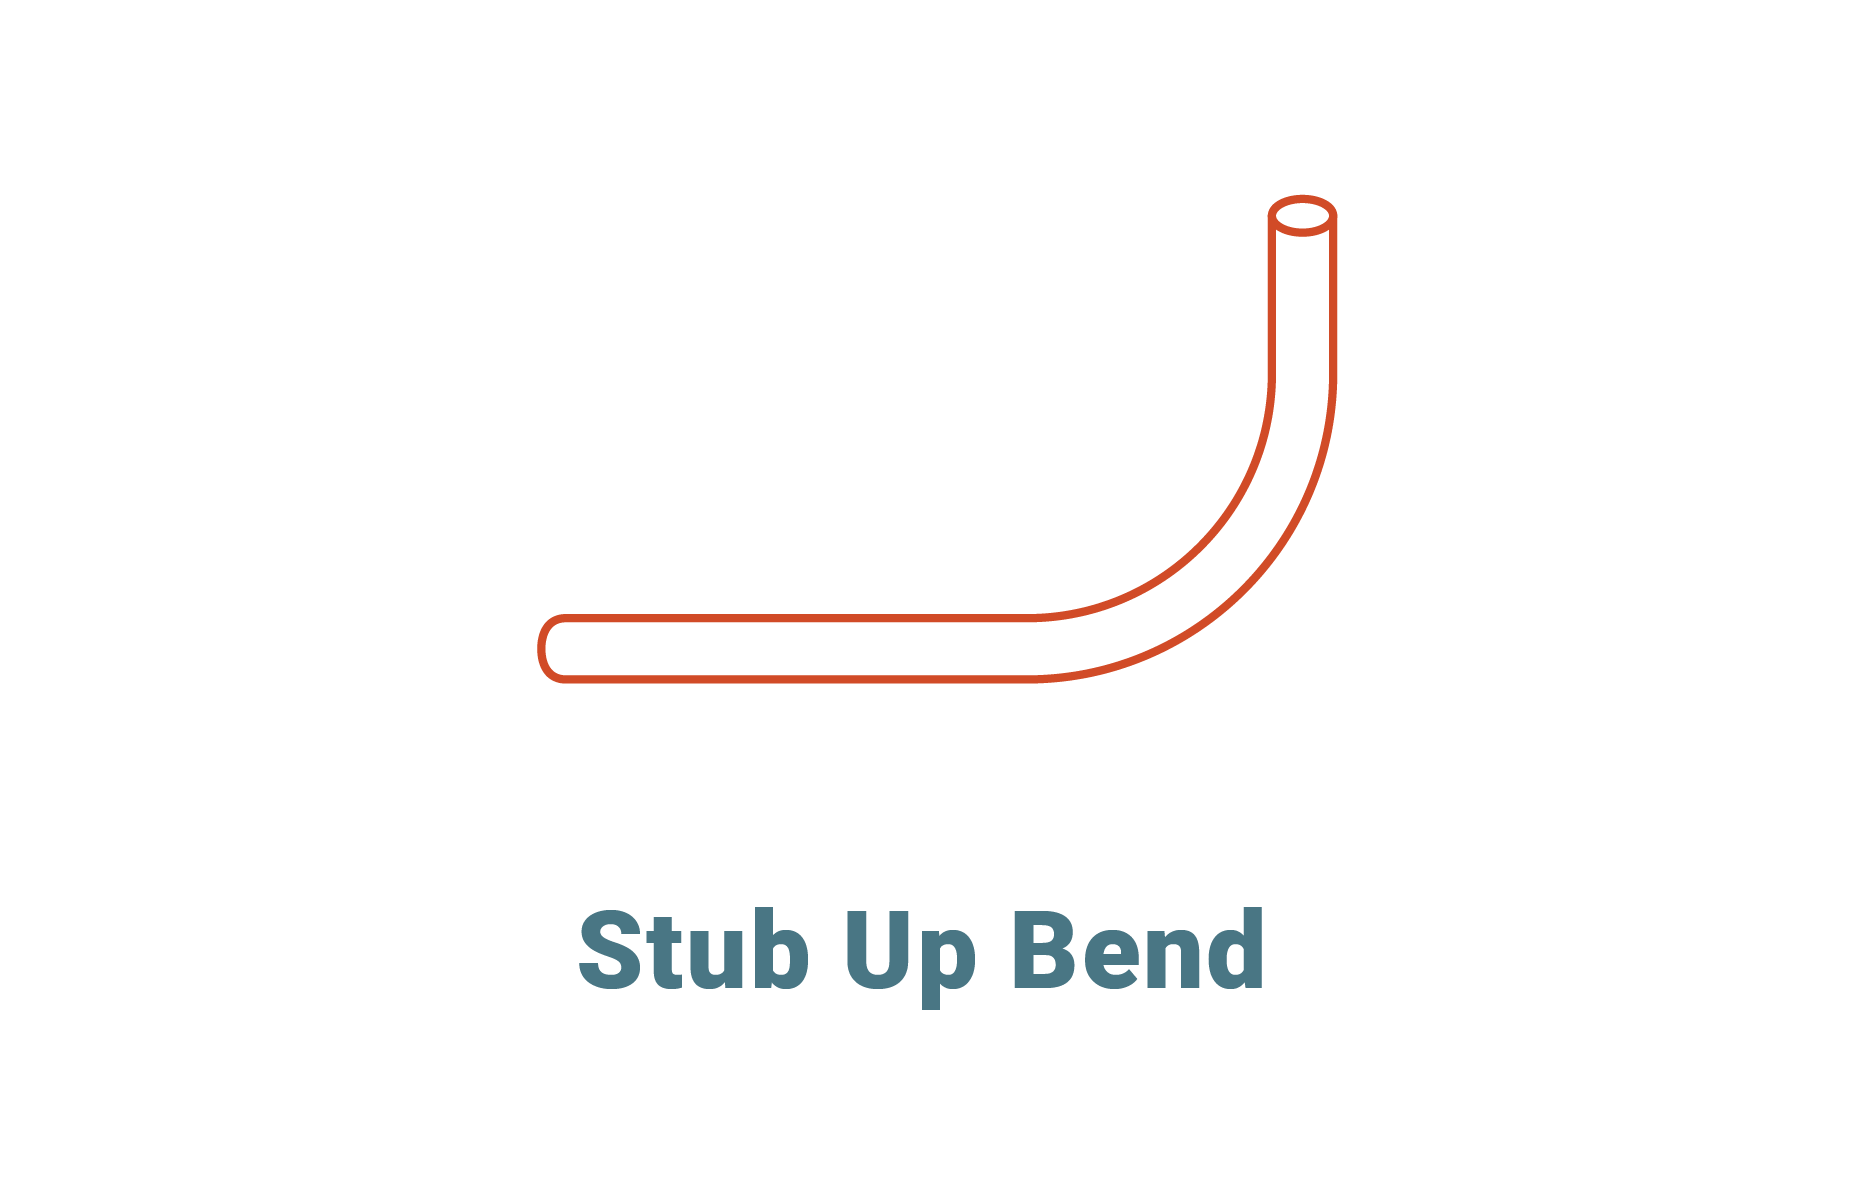
1. A stub-up bend is a 90º bend near the end of the conduit. Measure the planned length of the stub and the distance on the wall from the end of the conduit to the position of the bend.
2. Since the radius of the bend will add extra length to the bent end of your conduit, you need to subtract the take-up height. Account for this by subtracting these amounts from your measurement: If you're using ½" EMT conduit subtract 5"; for ¾" conduit subtract 6"; for 1" conduit subtract 8"; and for 1¼" conduit subtract 11".
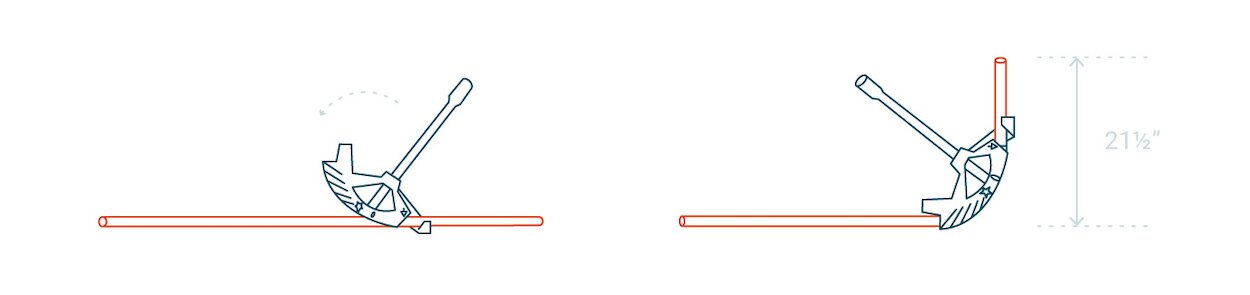
3. Place the conduit on the floor and measure from the end of it to the new length calculated, marking the conduit at this point. Line the arrow marking on the bender up so it points to this mark and slot the bender onto the conduit, making sure the bender handle is angled toward the end you measured from.
4. Now apply firm, constant foot pressure on the foot pedal to bend the conduit. Your foot should provide most, if not all, of the pressure. Use one hand to steady the handle on your bender without pulling, and your other hand to steady the conduit end once it rises within reach. Keeping bending until the end of it is vertical, or slightly past vertical.
5. Finally, check the bend with the torpedo level. (https://www.zoro.com/box-i-beam-and-torpedo-levels/c/5238/) Align it with the vertical length of conduit and, if necessary, bend the conduit to make small adjustments until the bubble of the level is centered. The conduit may flex back slightly once the bender is removed so bending slightly too far will provide optimum results.
Back-to-Back Bend
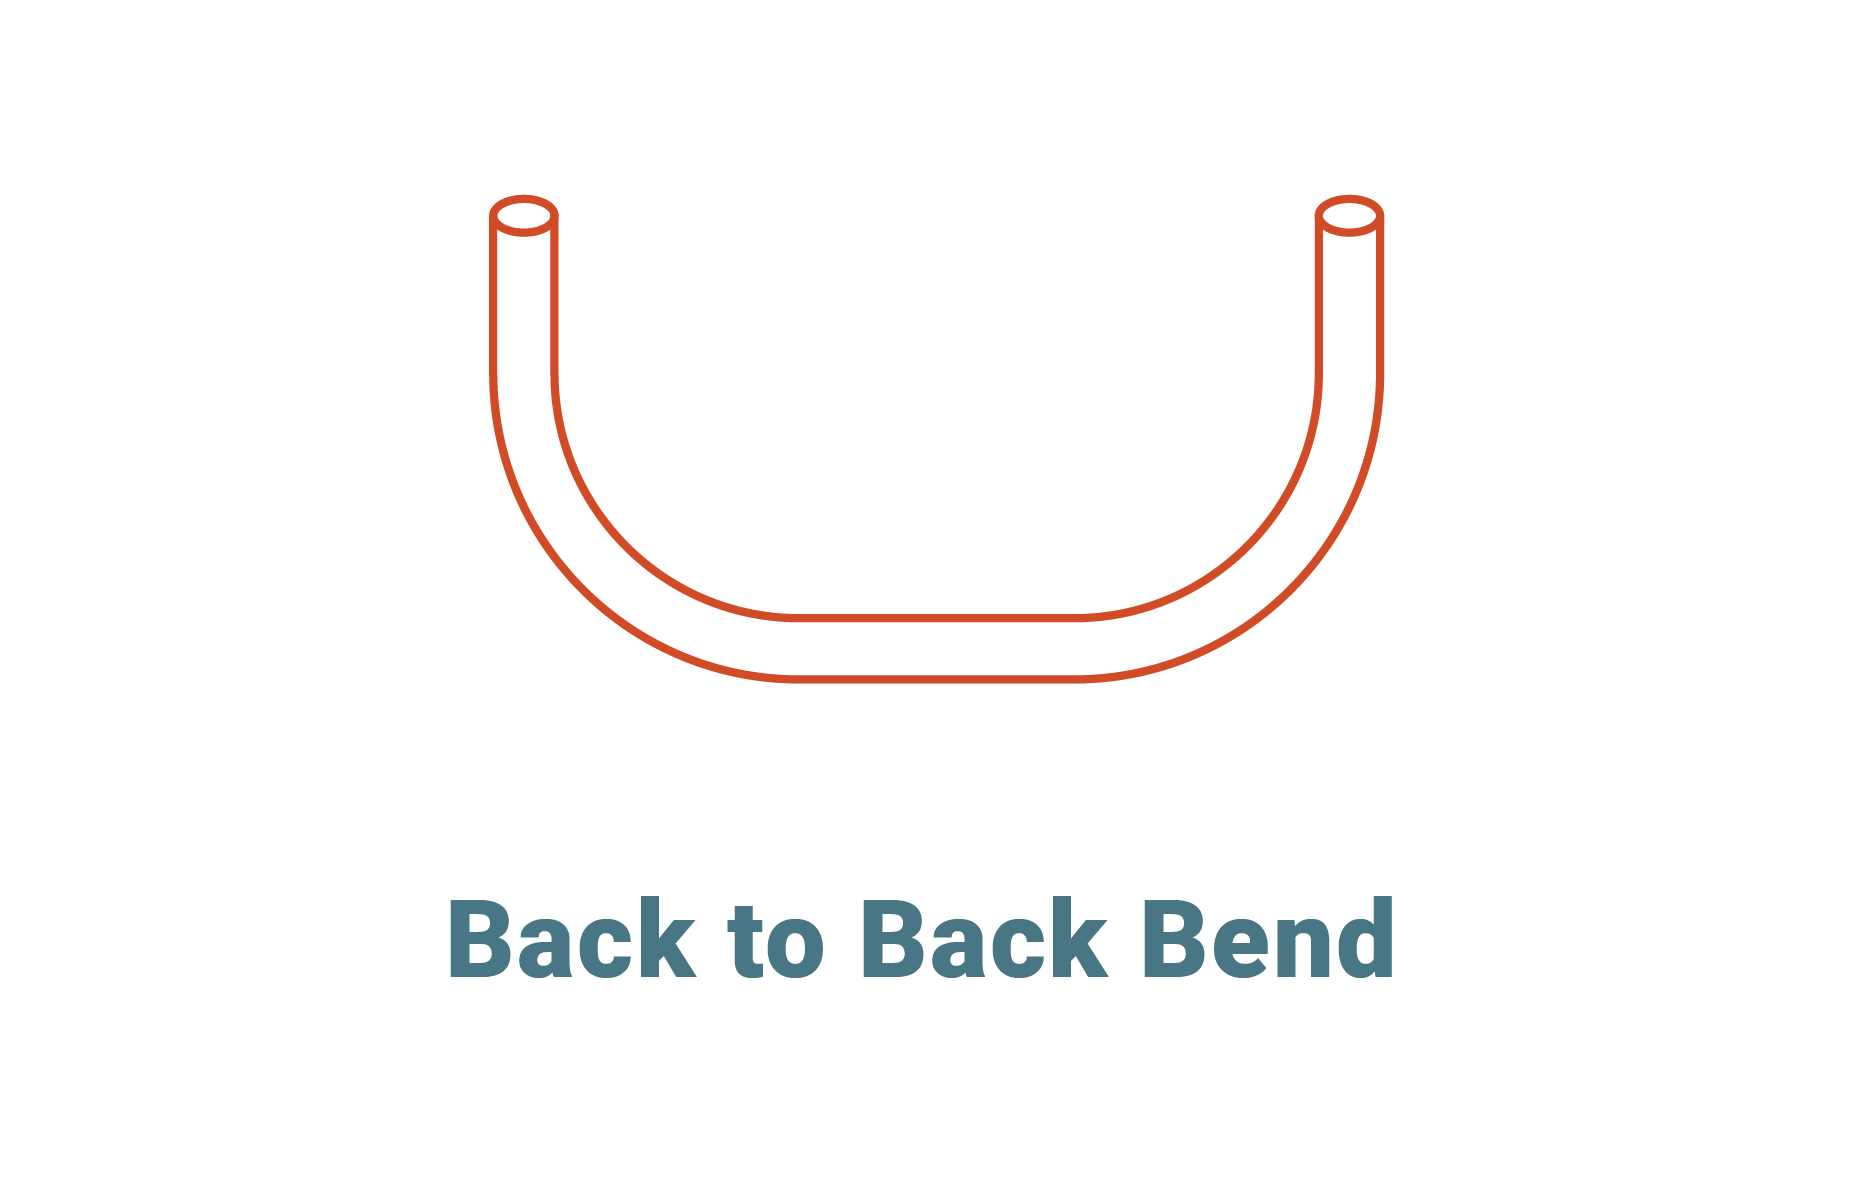
1. This bend refers to the distance from the back of one 90º bend to the back of the other, or the distance between the two parallel lines of a U-bend as measured from the outside edges. Start this bend by following the steps for the 90º stub-up bend.
2. Next, measure the distance that the two bends and conduit must fit within, such as between a couple of parallel walls.
3. Place the bent stub end of the conduit against the wall and measure from the wall along your conduit to your finished length. Using a permanent marker like a Sharpie, (https://www.zoro.com/markers-highlighters/c/5213/) mark the conduit at this length.
4. Align the bender's star symbol up with this mark, with its handle pointed away from the end you measured from. You'll need to use the stub-up system if the distance between the bends is too short for your bender to fit between. You'll now need to turn the bender the other way, subtract the take-up distance as you did with the stub-up bend, line the conduit up with the arrow mark and then make the bend.
5. Make the second bend by again applying firm, constant foot pressure on the foot pedal, letting the handle act as a support. When the second 90º angle bend is complete, check both to ensure both ends of the U are parallel.
Offset Bend
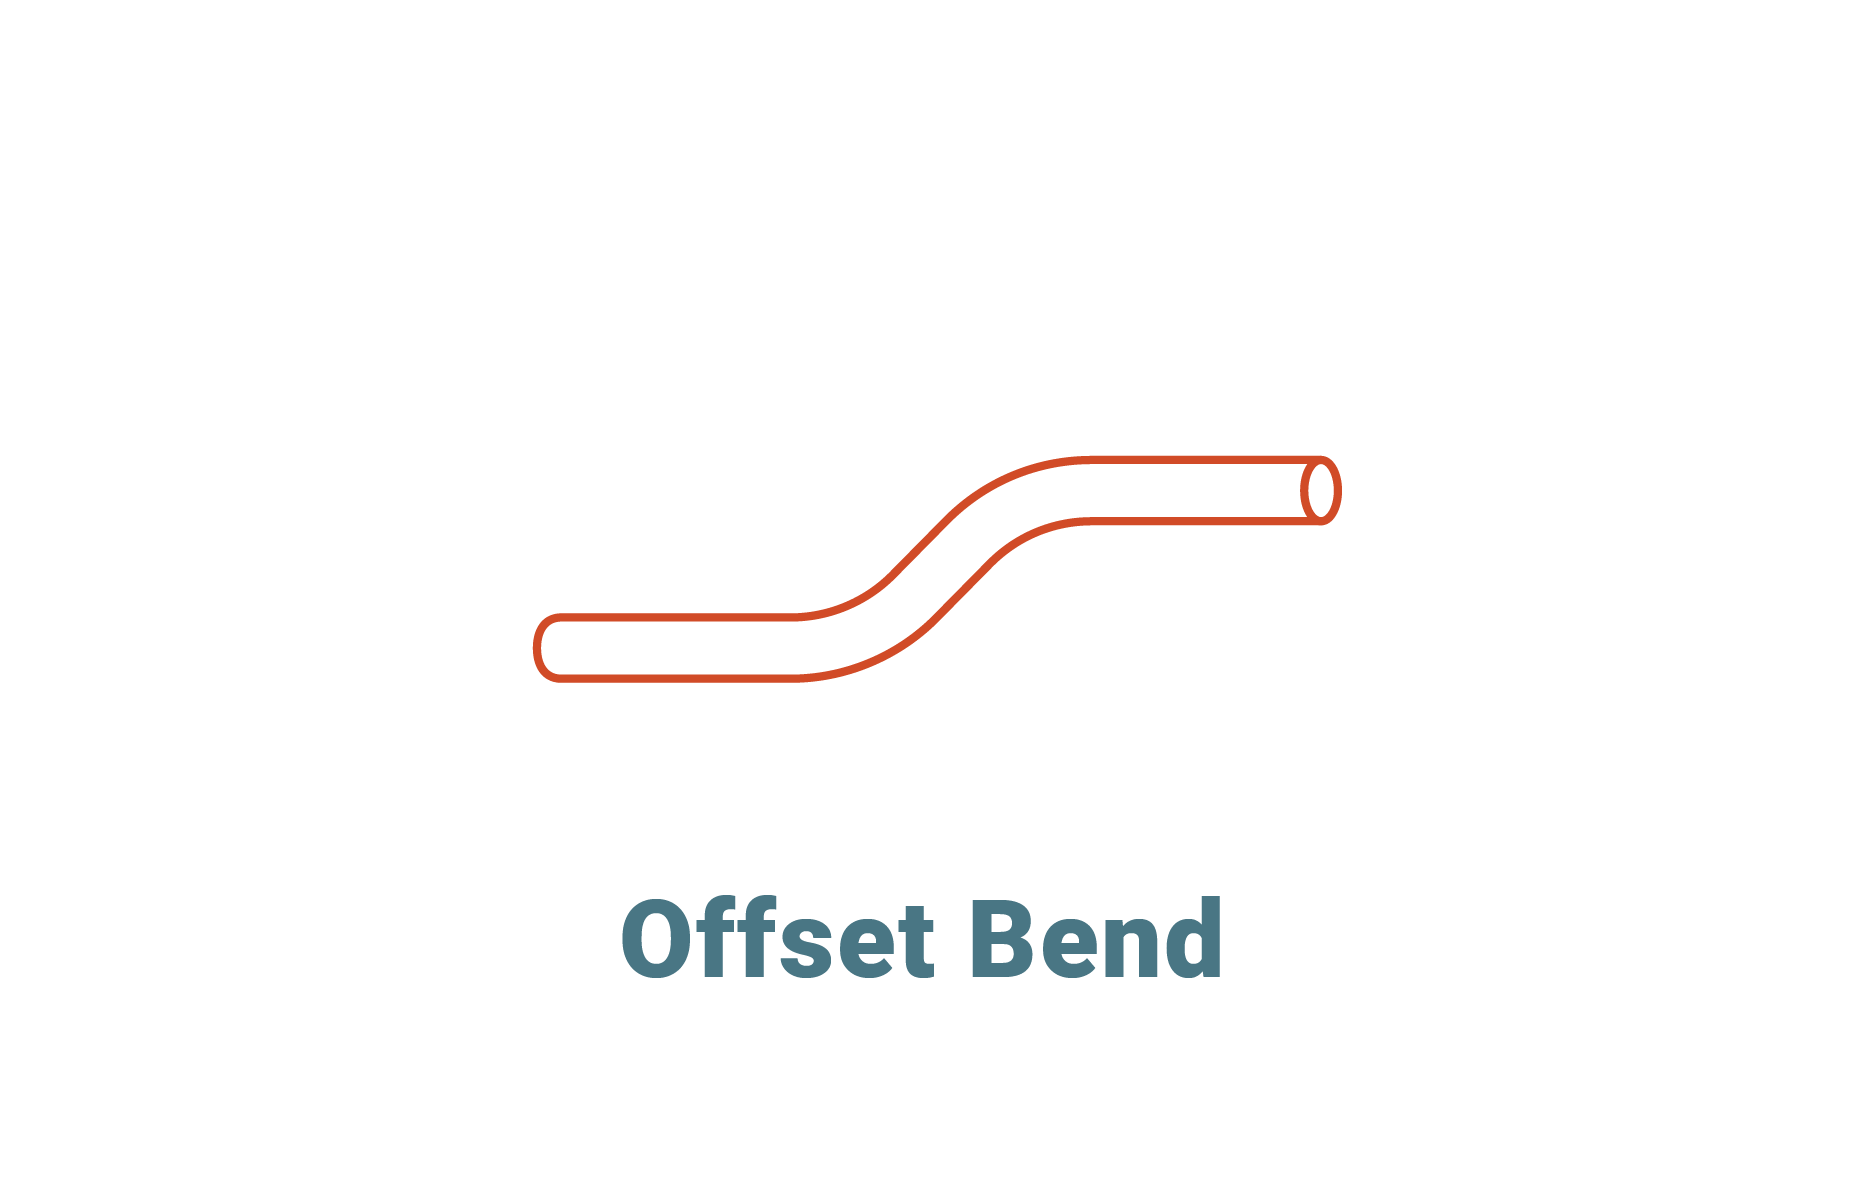
1. This bend is made up of two equal degree bends that are bent in opposite directions and is commonly used when the run of conduit changes elevations or to bypass an obstacle.
2. Begin by measuring the offset distance between the two parallel locations where the conduit will run before and after the bend, being sure to measure at right angles and not along the bend. Always measure between two identical positions on the conduit (top-to-top, center-to-center, or base-to-base,)
3. Next, choose an angle for the bend. Typically, the shorter the offset distance, the smaller the angle so an offset of a few inches might use a 10º or 22.5º angle, while an offset that's several feet long could require 30º or 45º. Smaller angles can be difficult to bend accurately, and if your raceway requires precise measurements, calculate the additional length required for the bend according to these calculations: A 10º angle uses an additional 1/16" of length per inch of offset depth; a 22.5º angle uses 3/16" per inch of offset depth; a 30º angle uses ¼" per inch; a 45º angle uses ⅜" per inch; a 60º angle uses ½" per inch. To determine the complete "shrinkage," multiply the offset depth in inches by the shrinkage value indicated.
4. Once you've determined the total shrinkage using the calculations in Step 3, add this number to the distance from the end of your conduit to the obstacle and mark the conduit at this length.
5. Each angle has its own offset multiplier so you'll need to multiply this value by the offset depth to get the length between your two bends. They are as follows: For a 10º angle, multiply the offset depth by 5.8; for a 22.5º angle, multiply offset depth by 2.6; for a 30º angle, multiply by 2; for a 45º angle, multiply by 1.4; for a 60º angle, multiply by 1.2.
6. Place the tape measure against the first mark you made indicating the location for the far bend. Now, measure back toward the end of the conduit until you get to the length you calculated. Mark the conduit at this spot, which will be the position of the near bend.
7. Make the far bend using the stub-up system by first placing the conduit on the floor. Line up the arrow on your bender with the first mark you made on the conduit and apply steady foot pressure to bend it. Be sure to watch the degree mark on the side of the bender that matches the chosen angle. Bend until this mark touches the horizontal portion of the conduit.
8. For the second bend, with the bender attached to the conduit, pick up the bender and flip it so the handle's end is on the floor. Slide the bender back toward you until the arrow lines up with the second mark you made on the conduit.
9. Without removing it from the bender, rotate the conduit 180º and sight along the conduit to ensure the bent end aligns along the exact same plane as your bender. The conduit will not lie flat if the bend is sticking out to one side.
10. Finally, to create the second bend by hand, brace the handle against your foot and leg and be sure the mark you made lines up with the arrow on the bender. Tightly grasp close to the bender head and start to slowly pull down until the conduit touches the appropriate angle mark on the bender.
Three-Point Saddle Bend
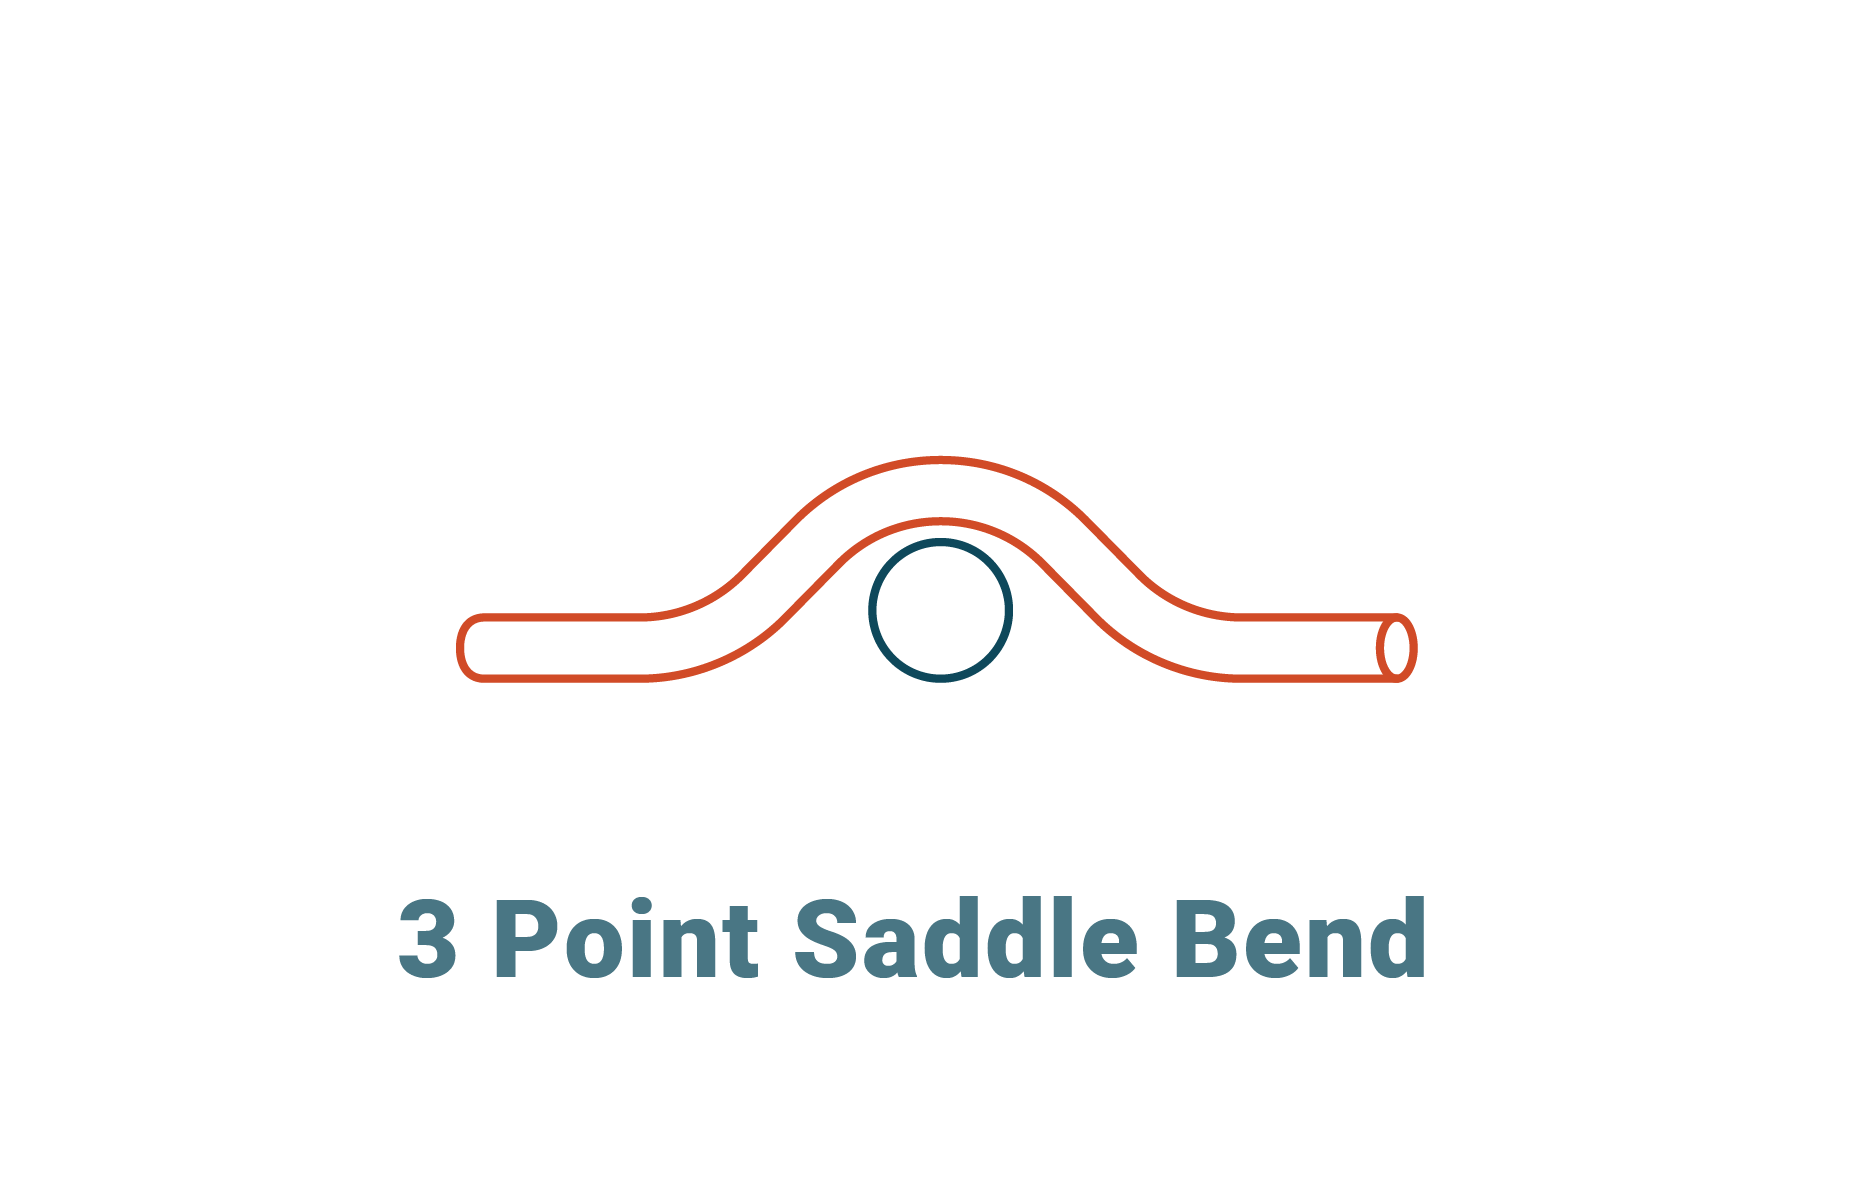
1. This is used to jump over small obstacles of about 6" or less and is made by bending the middle bend twice the degree of the two side bends with all three marks placed on the conduit before any bending is done.
2. Start by measuring where the center bend will be. The three-point saddle includes a bend to lift the conduit off the floor, a second bend to bend it down over the obstacle, and then the third bend to make it level with the floor again.
3. Calculate the position of the center bend as if it were an offset bend as described above. For instance, use a 60° center angle and two 30° outside angles, keeping in mind that a 30º angle creates ¼" shrinkage for each inch of rise. Multiply the height of the obstacle in inches by ¼" to find the total shrinkage, then determine the distance of the conduit end to the center of the obstacle. Add these two numbers together and measure this length from the end of the conduit and make your mark.
4. Next, determine the distance between bends as you would an offset bend above. Measure this distance twice, starting from the center mark and measuring in each direction. As an example, since a 30º angle has an offset multiplier of 2 as noted previously, a 3" high obstacle requires bends that are 6" apart (3" high obstacle x 2 = 6"). Draw a mark 6" to the right of the center mark and another mark 6" to the left.
5. Insert the conduit in the bender and look for three notches on it next to a "center bend" mark that looks like a semicircle with an arrow at the center. These notches correspond to 30º, 45º, and 60º angles. Line up the appropriate mark (in this case 60º) with the center mark on your conduit. Now bend until the conduit touches the correct 60º angle mark on the bender.
6. To complete the saddle bend, turn the conduit over, bracing the bender handle against your foot the same way you did to finish an offset bend. Rotate the conduit 180º in the bender so the bend is in the proper direction. Line up the 30º arrow mark on the bender with one of the marks on the conduit and bend to ½ the angle of the center saddle bend. Repeat for the third bend of the saddle.
Bending conduit isn't all that easy and it takes time to become skillful at it. Be patient, don't become frustrated, and in time your skills will improve.
Product Compliance and Suitability
The product statements contained in this guide are intended for general informational purposes only. Such product statements do not constitute a product recommendation or representation as to the appropriateness, accuracy, completeness, correctness or currentness of the information provided. Information provided in this guide does not replace the use by you of any manufacturer instructions, technical product manual, or other professional resource or adviser available to you. Always read, understand and follow all manufacturer instructions.