How to Glue PVC, CPVC, and ABS Pipes: A Commercial Plumbing Guide for Small Businesses
When you’re running a small business, dependable plumbing keeps your operation moving. Whether you’re overseeing a maintenance crew or managing repairs yourself, knowing how to glue plumbing pipes correctly helps prevent leaks, protects your equipment, and reduces downtime. This guide explains the adhesives to use, how to prepare your materials, and how long everything takes to set so you can keep your facility running smoothly.
Understanding Plumbing Pipe Materials
Choosing the right adhesive starts with knowing the type of pipe you’re working with. Each material performs differently and requires a compatible cement.
PVC (Polyvinyl Chloride)
Common in cold-water systems, drains, and irrigation. It’s lightweight and easy to cut, but needs primer before gluing.
CPVC (Chlorinated Polyvinyl Chloride)
Handles higher temperatures—ideal for hot-water lines or chemical applications.
ABS (Acrylonitrile Butadiene Styrene)
Durable, black piping used for venting and drain lines. Often doesn’t require a primer.
When Materials Don’t Match
If you're connecting ABS to PVC, use a transition cement specifically marked for both materials. Using a cement not formulated for the job may weaken the joint or lead to early failure.
Choosing the Correct Plumbing Cement
Solvent cement works by softening the pipe and fitting so they can fuse together. Using the correct cement helps create a long-lasting connection.
- PVC Cement: Bonding for PVC applications.
- CPVC Cement: For high-temperature systems or hot-water lines.
- ABS Cement: For ABS pipes, sometimes applied without primer.
- Transition Cement: For joining PVC and ABS safely.
Check the label for pipe material compatibility, temperature ratings, and application guidelines. Many businesses keep multiple cements on hand so maintenance teams can work efficiently without stopping to source specific adhesives.
Preparing Your Pipe and Fittings
Solid prep work reduces callbacks and helps prevent leaks.
- Cut square: Straight cuts help the surfaces align.
- Deburr and bevel: Smooth edges allow better cement distribution.
- Dry-fit first: Confirm alignment before applying cement.
- Clean the surfaces: Remove moisture, dirt, or oil.
- Prime when required: PVC and CPVC require primer before cement application.
These steps take only a minute but support a stronger connection.
How to Glue Plumbing Pipes: Step-by-Step
This process applies to PVC, CPVC, and ABS with the appropriate cement.
Step 1: Prime (If Required)
Apply primer to the outside of the pipe and inside of the fitting. This prepares the plastic and helps the cement fuse the materials.
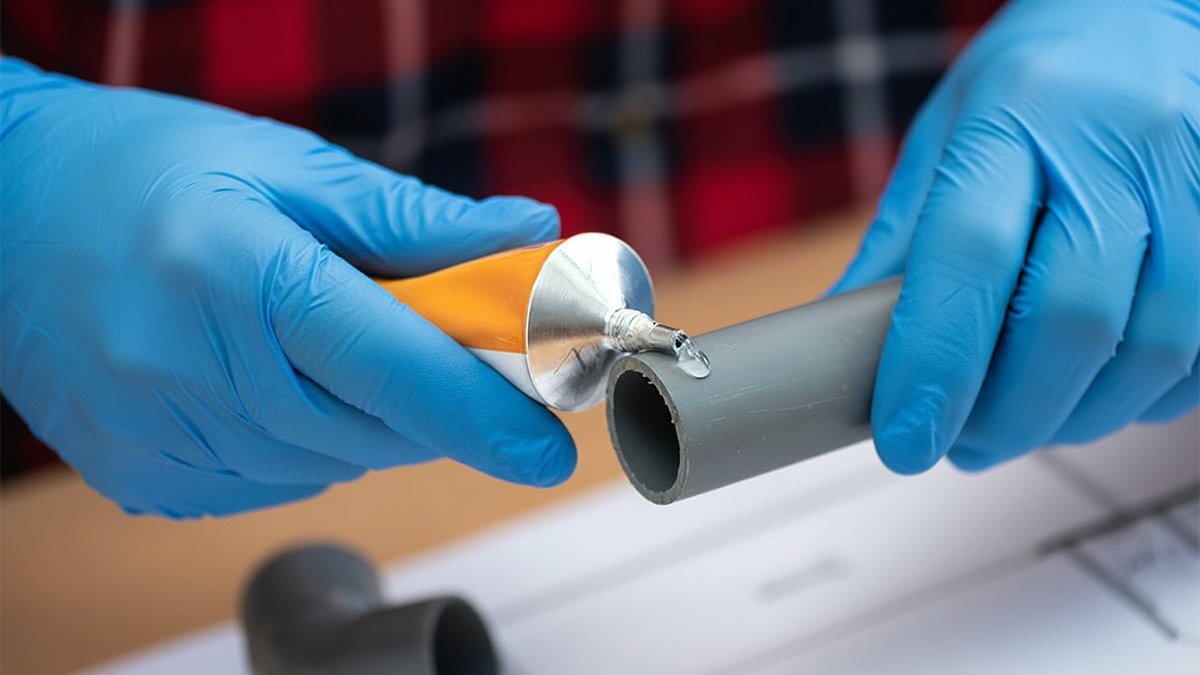
Step 2: Apply the Cement
Use the correct applicator size to spread cement evenly across both surfaces. Avoid over-application, as excess cement inside the joint may restrict flow.
Step 3: Assemble the Joint
Push the pipe firmly into the fitting while giving a quarter turn. Hold the joint for about 15 seconds so it can set properly.
Step 4: Clean the Connection
Wipe away excess cement for a clean finish and safer inspection.
Plumbing Glue Drying Time and Cure Time
Drying time affects how soon you can handle or test the system.
- Initial Set Time: Typically 5 to 15 minutes
- Full Cure Time: Up to 24 hours before pressure testing
Temperature, humidity, and pipe size influence curing time. Cold or humid conditions extend the curing process, so consider environmental conditions when scheduling repairs. Always consult the manufacturer’s curing chart for specific instructions.
Long-Term Leak Prevention Tips
Reliable plumbing protects your business from avoidable downtime. These best practices help support long-term performance.
- Match the cement to the pipe type and application.
- Inspect each joint for alignment and cleanliness before curing.
- Store adhesives in temperature-stable areas and replace aging stock.
- Incorporate plumbing inspections into your facility maintenance routine.
- Remember: solvent-welded joints cannot be separated. If you need to replace a section, the pipe must be cut out.
Final Takeaway
Strong, dependable plumbing connections come from careful prep, compatible materials, and proper curing time. When your maintenance team follows structured steps and uses the correct adhesive for each pipe type, you help protect your facility from leaks, rework, and unplanned downtime. A little attention during installation supports a smoother workflow and gives your team time back to focus on growing your business.
Product Compliance and Suitability
The statements contained in this guide are intended for general informational purposes only. Such statements do not constitute a product recommendation or representation as to the appropriateness, accuracy, completeness, correctness, or currentness of the information provided. Information provided in this guide does not replace the use by you of any manufacturer instructions, technical product manual, or other professional resource or adviser available to you. Always read, understand, and follow all manufacturer instructions. Portions of this article were generated in part by ChatGPT, and edited by a member of the Zoro team.