How to Use a Soldering Iron
12/2/20 - Zoro Staff
Whether you’re tinkering away at DIY projects in your garage or entering a career in electronics repair, metalworking, plumbing, or a variety of other fields, a soldering iron is an essential tool that you’ll want to have by your side. Here, we’ll take a closer look at how soldering irons work, how to use them safely, and more.
What Is a Soldering Iron (or Soldering Gun) and How Does It Work?
A basic soldering iron is a pretty simple tool—it uses electricity to heat up a metal tip to very high temperatures in order to transfer heat to wires or other components. Then solder, a type of metal, is melted and applied to form a joint or connection between two components. Once the solder cools down, the connection is more or less permanent.
The solder itself is typically a spool of metal tubing, often made from an alloy of tin and lead and specially designed for this purpose. The most common type of soldering tool is a straight soldering “pen” or iron, but other options are available, including soldering “guns” that include a trigger switch for easy operation.
How Hot Does a Soldering Iron Get?
Generally speaking, the temperatures used for soldering are in the range of about 400°F to 800°F—very hot, in other words! Solder, the metal alloy that is melted by a soldering iron or gun, needs to reach a temperature of at least 360°F in order to melt, although some softer solder alloys have a lower melting point, and some harder alloys may have a higher melting point. Some irons are adjustable, while others simply switch on and off—with the tip of the iron gradually heating as soon as it’s switched on.
As you can probably imagine, even though the handle of a soldering iron or gun is typically insulated for protection, the metal tip can pose a safety hazard due to the extreme temperatures involved. Safety and awareness are extremely important when using any soldering equipment. Using the right soldering accessories, such as a soldering iron stand, can help to reduce these safety hazards. We also recommend working in a well-ventilated area and using a fume extractor and safety glasses to avoid contact with harmful fumes.
What Is the Best Soldering Rework Station?
Having a soldering station (or a hot air rework station) set up in your space can be very handy if you’re doing soldering work regularly. These aren’t just spaces to perform soldering work, as the name suggests—they’re actually tools that make the job significantly easier.
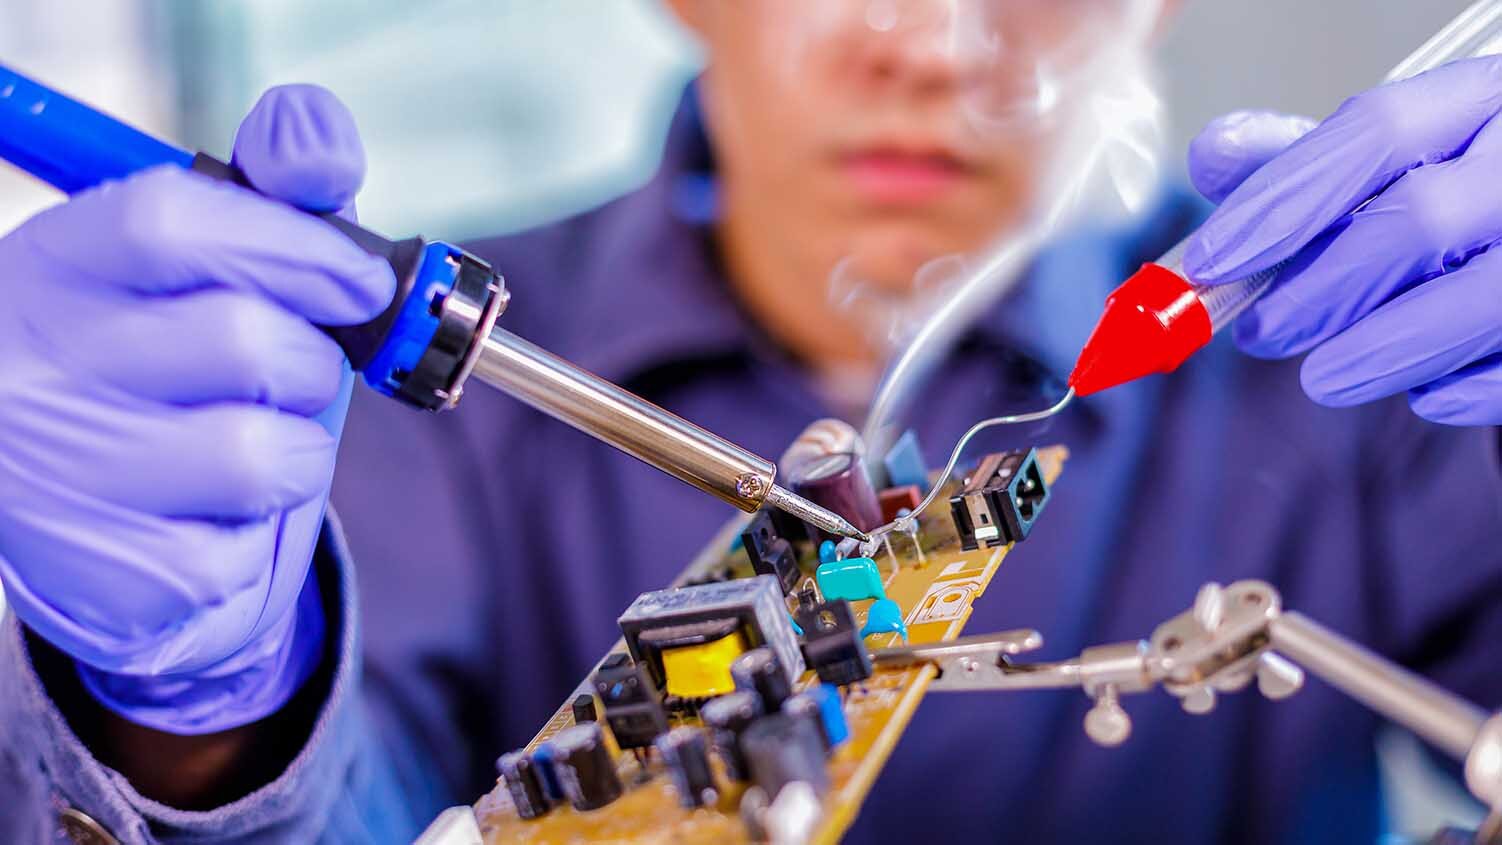
Essentially, these stations combine a soldering iron (or pen) with a unit that allows you to adjust the temperature for different jobs. Some soldering stations also include helpful safety features, such as temperature sensors, and useful add-ons like LED displays or extra soldering tips. These stations are often used in electronics repair when working with printed circuit boards (PCBs). A wet sponge can also come in handy for cleaning the iron’s metal tip before each use.
How to Use a Soldering Iron or Gun
Here are the basic steps involved in using a soldering iron and station:
1. Remember to follow safety precautions, such as keeping the hot soldering iron in a stand while you’re not using it, working in a well-ventilated area, and wearing safety glasses.
2. Select the right tip for your work, if you have the option. Pointed tips are better for precise work, while flat tips can cover a larger surface area.
3. Set the temperature on your soldering station (if you have one). Like the tip, the temperature you choose will depend on the work you're doing. For more precise work, such as soldering on circuit boards, you’ll want to use a lower temperature. A higher temperature is better for larger components. The general range is about 600°F to 800°F, but make sure you’re using the right units for your soldering station, which may display the temperature in Celsius.
4. Tin the tip to clean it by applying a small amount of solder to the hot metal tip, then cleaning it with a wet sponge. This helps to remove corrosive oxides for more efficient soldering.
5. Apply a bit more solder to the iron tip while holding it alongside the joint or connection in order to heat it.
6. Once it’s heated, quickly apply solder to the joint with the tip of the soldering iron. Remove the iron from the joint and let it cool into place.
Of course, the exact process will depend on a variety of factors, including the components you’re working on, the type of solder you’re using, and other considerations. For more tips on soldering and maintenance, see our article on How to Clean and Maintain a Soldering Iron.
Product Compliance and Suitability
The product statements contained in this guide are intended for general informational purposes only. Such product statements do not constitute a product recommendation or representation as to the appropriateness, accuracy, completeness, correctness or currentness of the information provided. Information provided in this guide does not replace the use by you of any manufacturer instructions, technical product manual, or other professional resource or adviser available to you. Always read, understand and follow all manufacturer instructions.