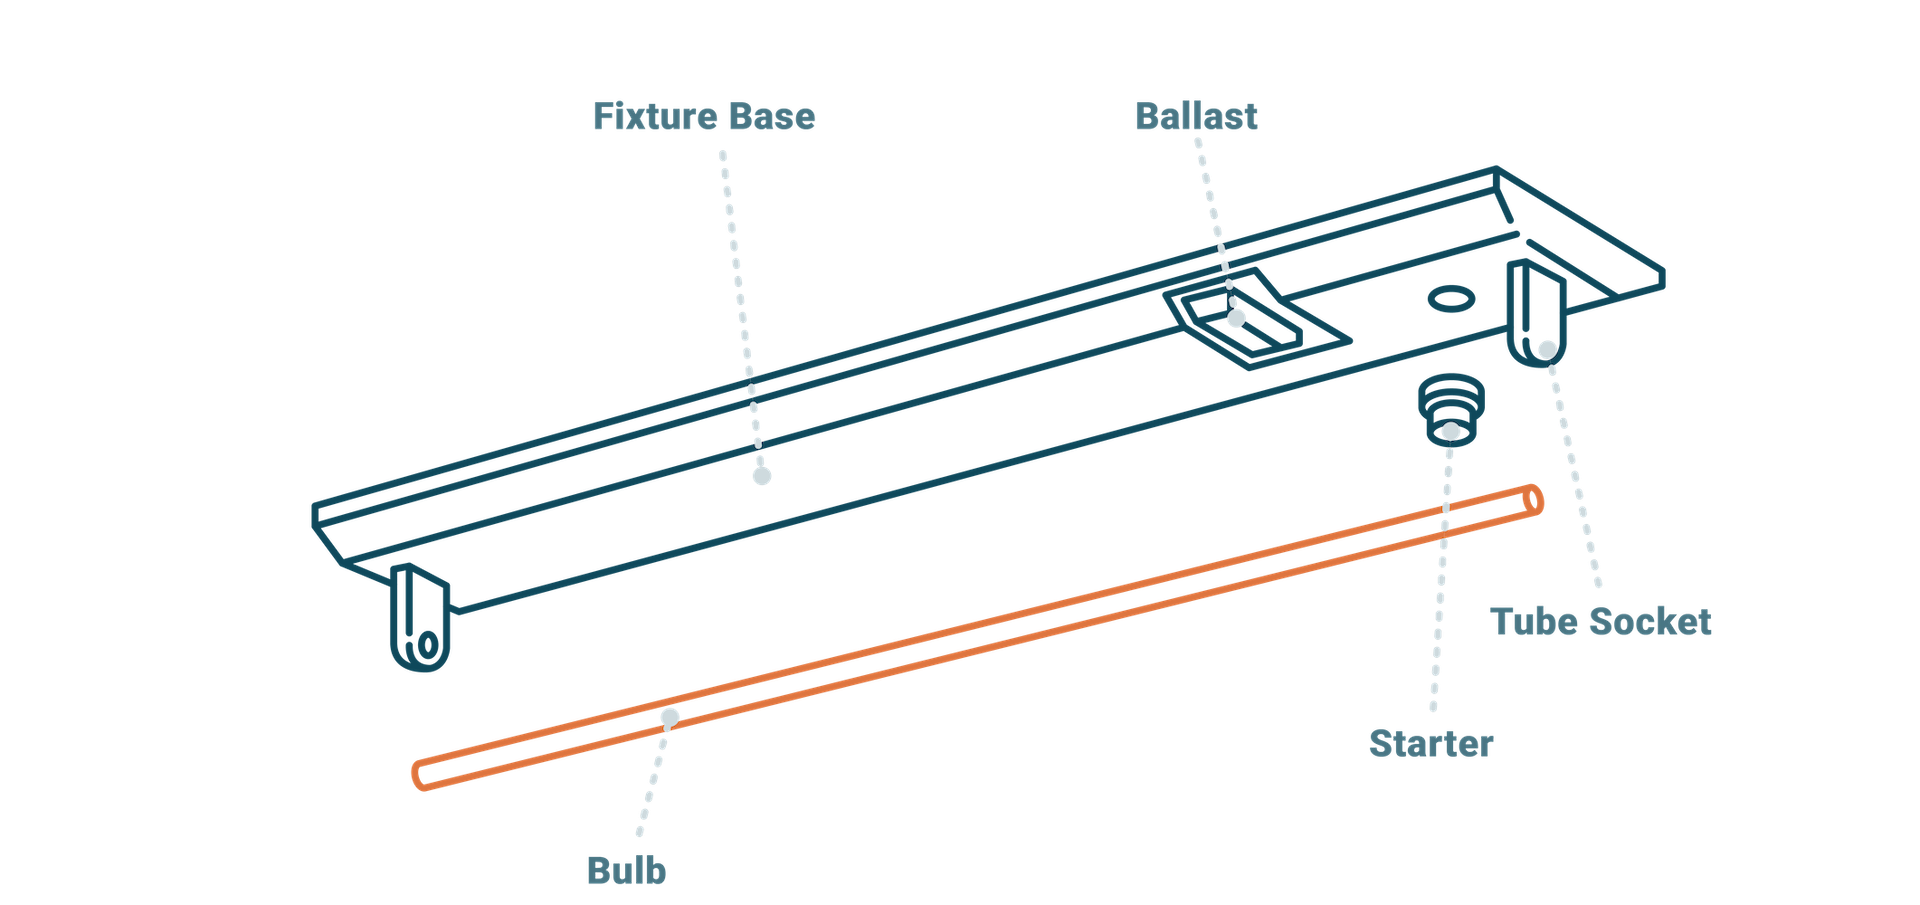
How to Replace/Install Linear Fluorescent Lights
Learn the proper way to replace/install fluorescent light bulbs with a step-by-step guide on linear fluorescent lights.
Linear fluorescent lights are a staple in offices, schools, hospitals, warehouses, and a wide variety of other commercial buildings because of their efficiency, long life, and relatively low up-front cost. Linear fluorescent lights (LFLs) are gas-discharge tubes that use electricity emitted from cathodes to excite mercury vapor contained within the light, where phosphors and a noble gas like argon are also present. When excited, the mercury atoms create UV light, causing the phosphors in the lamp to glow, which produces the visible light.
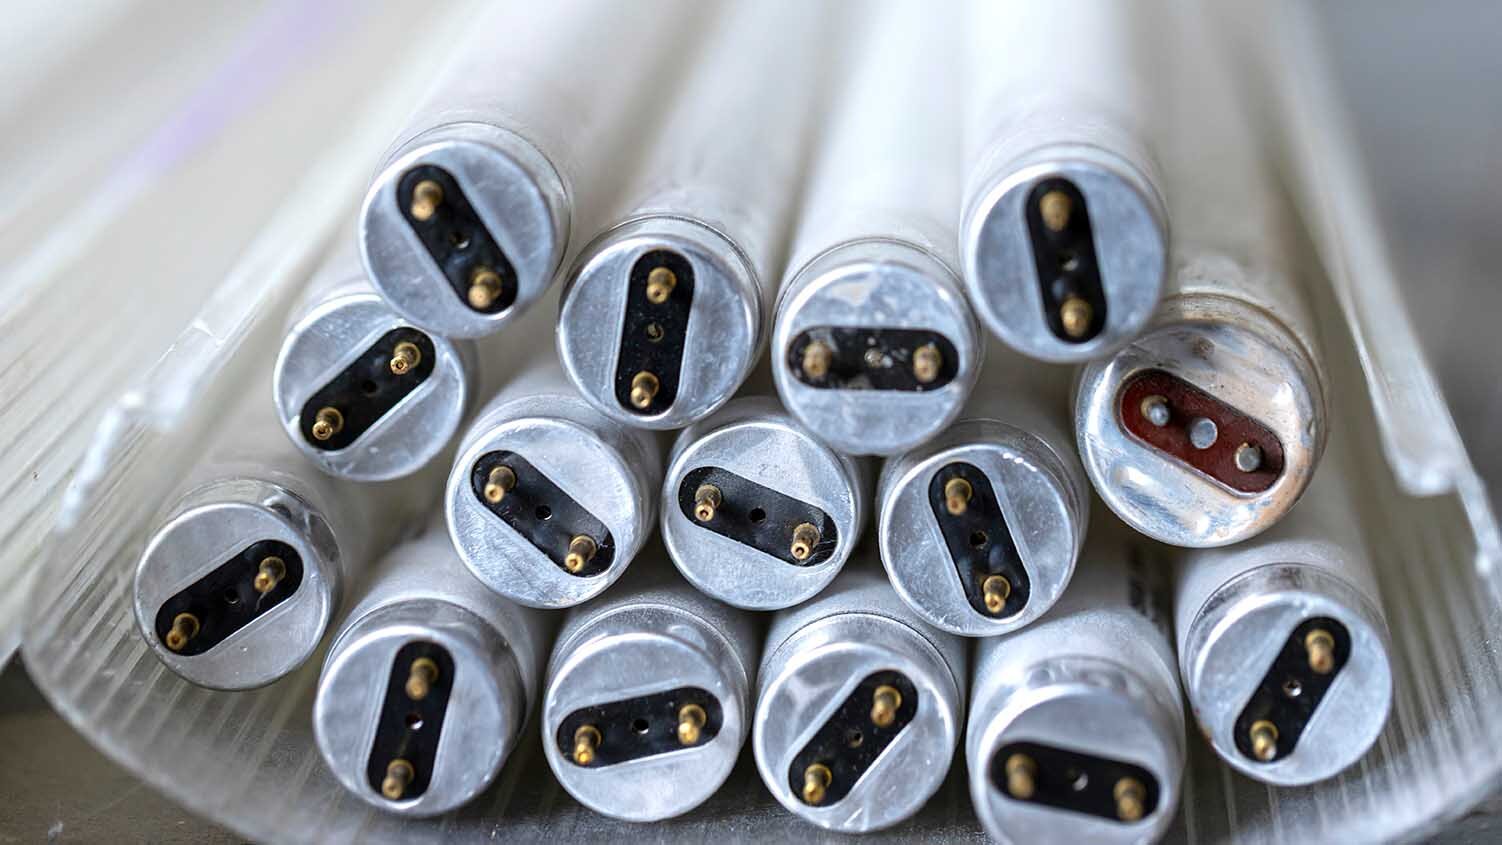
While these fluorescent light bulbs are long-lasting, there are times that they'll need to be replaced: when they burn out, flash on and off, flicker, or dim. Servicing them is very simple and it takes very little time to remove and install a new light bulb. If the linear fluorescent light bulb is not functioning, start by looking at the ends of it. If the ends are dark and blackened, it's likely burned out and needs replacing. If it's not working, and the ends aren't blackened, remove it from its sockets and test it in another fixture.
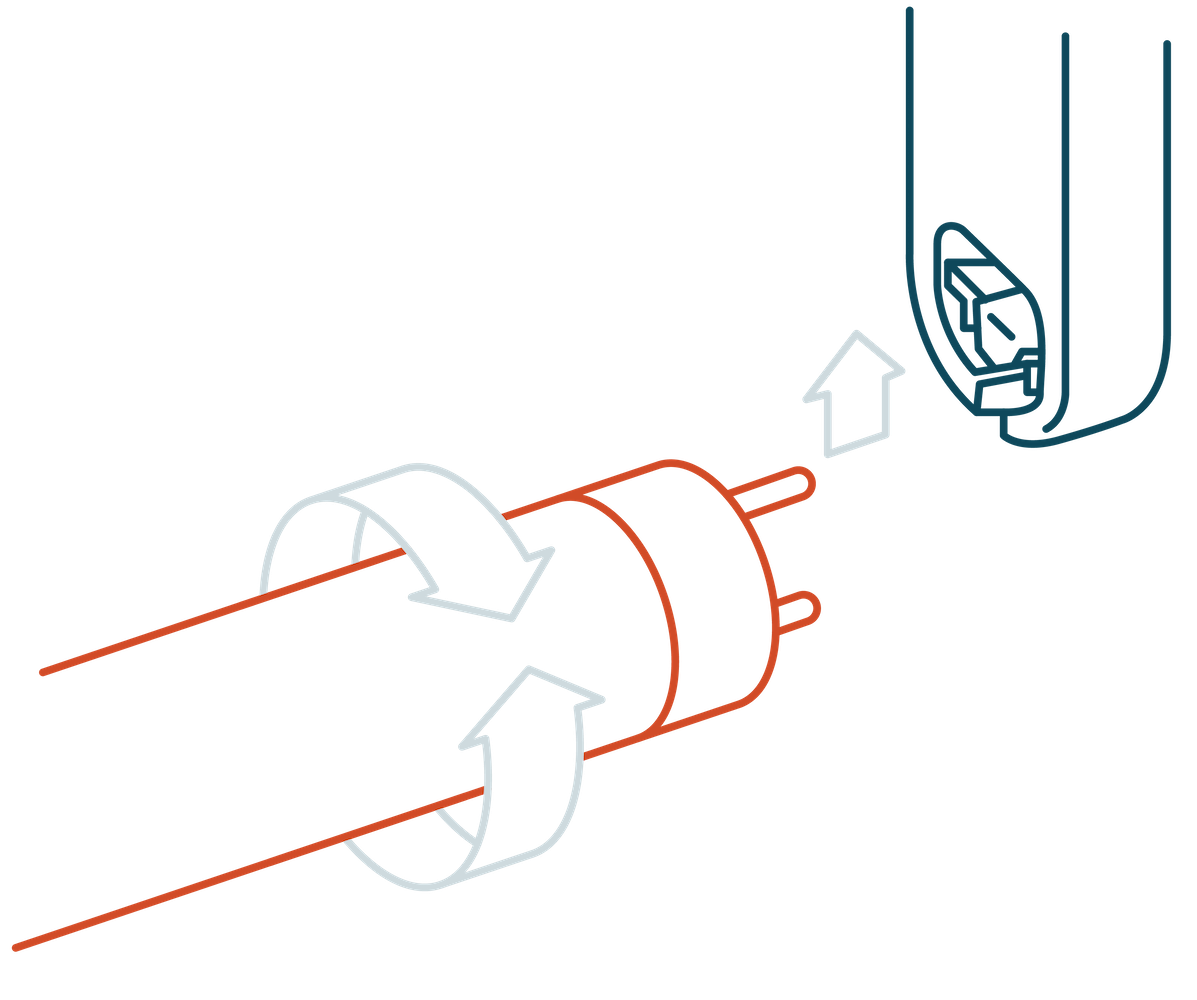
To remove the light bulb, first be sure the fixture is turned off and remove the light casing protecting the bulb. Now, holding the bulb at the end, rotate it 90O until the pins holding it in place are loosened and you can remove the bulb. Once removed, insert the LFL in the other fixture, which should be turned off. After you've put it in the other fixture, flip the fixture on and if the linear fluorescent light bulb doesn't illuminate, it's burned out and needs to be replaced. If it does light up, the LFL is obviously not the issue, meaning it's likely the ballast, starter, or the entire fixture from which it was removed that may need to be replaced.
|
Installing a new fluorescent tube |
Installing a starter in a fluorescent fixture |
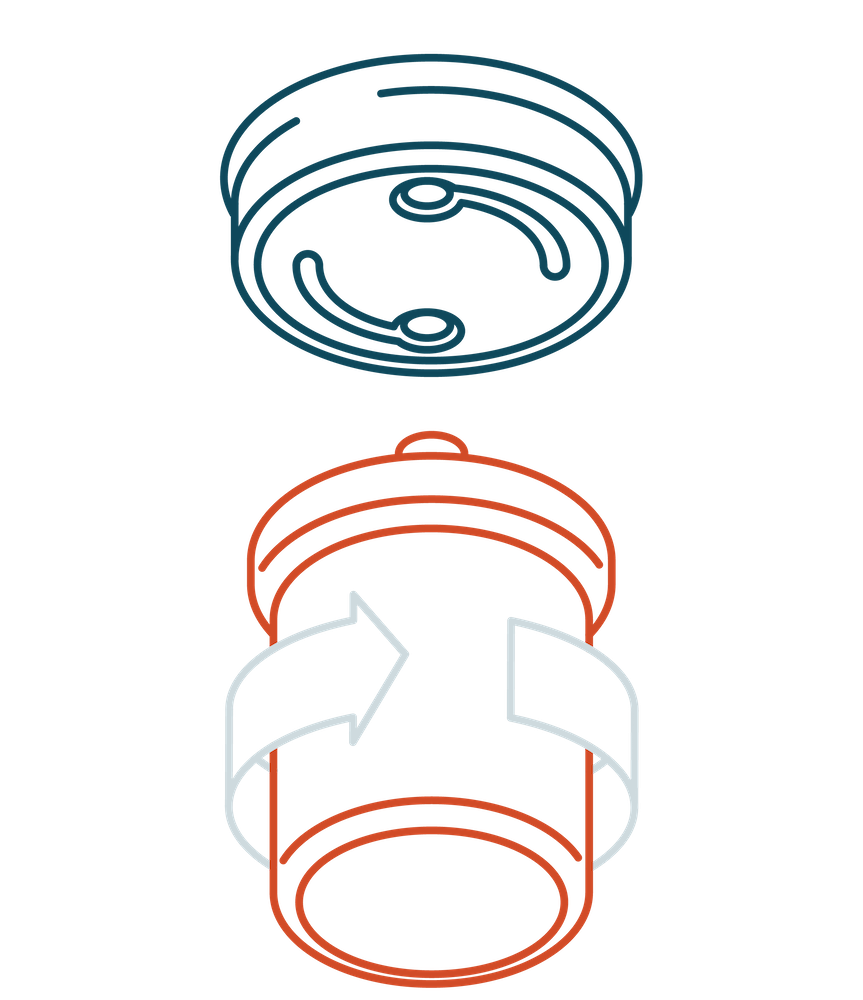
Inserting a new LFL is as easy as removing the burned out one, but just in reverse. Insert the pins on one end of the tube so it seats securely. Now, insert the pins on the other end of the tube and rotate 90O again, but in the opposite direction from when you removed it. Once in place, test to make sure it works by switching the fixture back on.
With it working again, reattach the light casing protecting the LFL and enjoy the even and shadow-free illumination that linear fluorescent lights provide.
Product Compliance and Suitability
The product statements contained in this guide are intended for general informational purposes only. Such product statements do not constitute a product recommendation or representation as to the appropriateness, accuracy, completeness, correctness or currentness of the information provided. Information provided in this guide does not replace the use by you of any manufacturer instructions, technical product manual, or other professional resource or adviser available to you. Always read, understand and follow all manufacturer instructions.